
This blog post may contain affiliate links. If you click on these links and make a purchase, I may receive a commission at no extra cost to you. Please note that this blog is primarily for educational purposes and the content here is not intended to be a substitute for professional financial advice. Please review my disclaimer and terms here.
As a business owner and marketer, I encounter my fair share of setbacks, and a significant percentage of the experiments I test are failures.
But whether you’re winning or losing, there are always lessons to be learned and experience to be gained. And failing every now and again is just part of the job description. There’s no judgment. It’s just the way it is for entrepreneurs.
That said, you obviously want to try and minimize the number of obstacles and failures you have to deal with. So, to that end, I decided to create a post detailing some of my more recent failed experiments.
For each experiment, I talk about what my goals were, how each experiment worked, what the outcome was, and my reflections on the experience.
The goal here is that you either learn from my experiences or come up with a way to make the experiments work. If you do find a way to turn any of these strategies into a success, please let me know!
But until then, let’s take a look at the experiments I tried and what went wrong…
Failed experiment #1: Ranking videos with RankSnap
The premise:
RankSnap is a search engine optimization tool that helps you rank anything on the first page of Google and YouTube using backlinks. I was excited to try this tool and thought it could help improve the rankings of some of my Low Hanging System product videos. My goal was to get my videos ranked on the first page of both Google and YouTube.
What I did:
I purchased RankSnap for $57 and I thought it made the most sense to test this tool using videos. So I chose three quick product videos promoting three different LHS coffee mugs.
To get started with RankSnap…
- Click on the Projects tab then Create New Project.
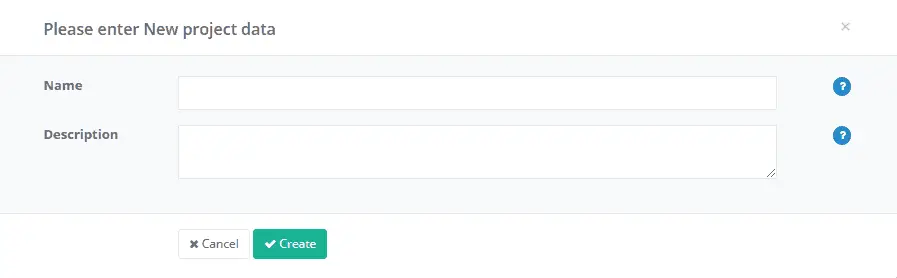
- Name your project and include a brief description.
- Hit Create.
Now, you need to switch gears to set up your accounts.
- Click the Accounts tab.
- Select the project you just created.
- You will see all of the possible sites that you can submit content to in order to get backlinks. There are Status Update sites, Bookmarking sites, Blog Post sites, and Video sites.
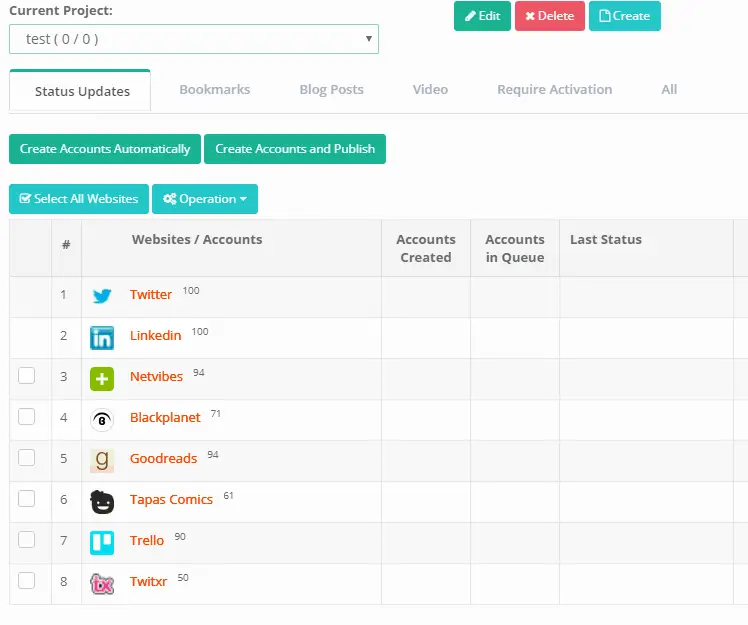
For each option, you can click the Select All Websites button. Then, hit Create Accounts and Publish. Depending on which tab you’re under (Status Updates, Bookmarking, Blog Posts, or Video), follow the prompts, add content and links accordingly, and when you’re done, click Start Creating and Publishing.
After setting up your accounts, you’re ready to create your first campaign.
- Click the Campaigns tab.
- Choose your project from the dropdown menu.
- Click Create New.
- Title your campaign.
- Enter the URL of the video or page you want to rank (one per line).
- Enter the keywords you want to rank (one per line).
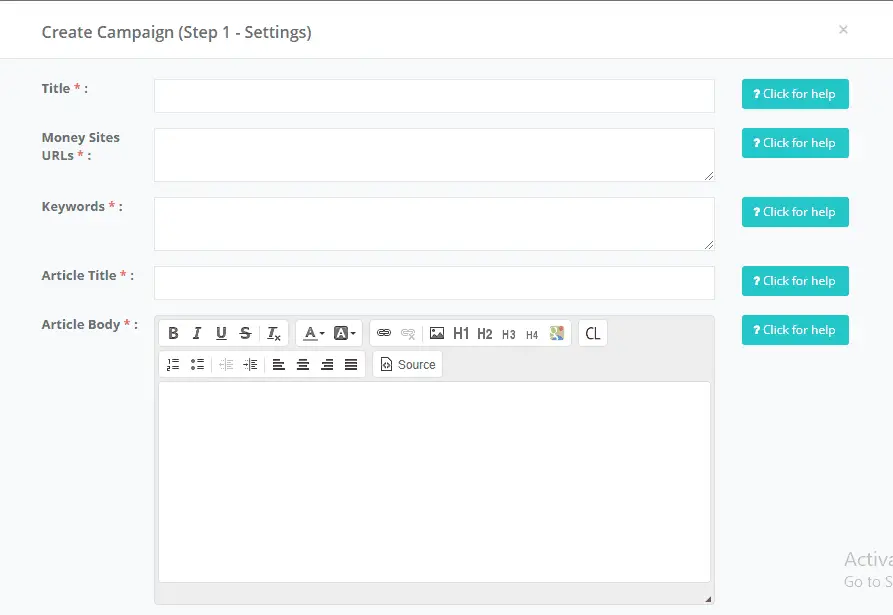
Now, you need to add the article title and body you want to be posted with the backlinks to your video or webpage. You have to actually write these articles yourself, which can take up a bit of time, especially if you’re not into writing. But the articles don’t have to be anything fancy. You just have to sprinkle your keywords throughout the text. My articles were between 300 and 400 words.
The cool thing you can do with your articles here is making them “spinnable,” meaning you can include alternative phrases and word choices in your articles enabling RankSnap to create “new” pieces of content from your existing articles.
The way article spinning works is you include additional options for words, phrases, or whole sentences within brackets in your text. For example…
“{Sipping |Enjoying |Drinking} a {hot | warm | steamy} {beverage| drink} from a {coffee mug | coffee cup | mug | cup} is a relaxing morning {pastime | ritual} that {lots of | many} people {enjoy | do} because it helps them {wake up | get their day started off right | feel alert | feel ready to take on the day}.”
You can add as many options as you want. In fact, the more options you add, the better. That way, RankSnap has more ways to spin your text to create lots of different versions of your articles, making each one that RankSnap posts for you “unique.” Article spinning makes it so you can avoid getting penalized for having duplicate content without having to write one unique article after another.
Drawing from the above example, several versions of the opening could be created using article spinning. For starters…
Sipping a hot beverage from a coffee mug…
Enjoying a warm drink from a coffee cup…
Drinking a steamy beverage from a mug…
…And so on…
So you create an article and then add it to your RankSnap campaign. You should always click Preview and hit the Refresh button several times to make sure the spinned formatting looks correct.
You also want to add links to your articles. You can do this by highlighting the keywords in your articles and then clicking the CL button (Campaign Link) in the top right.
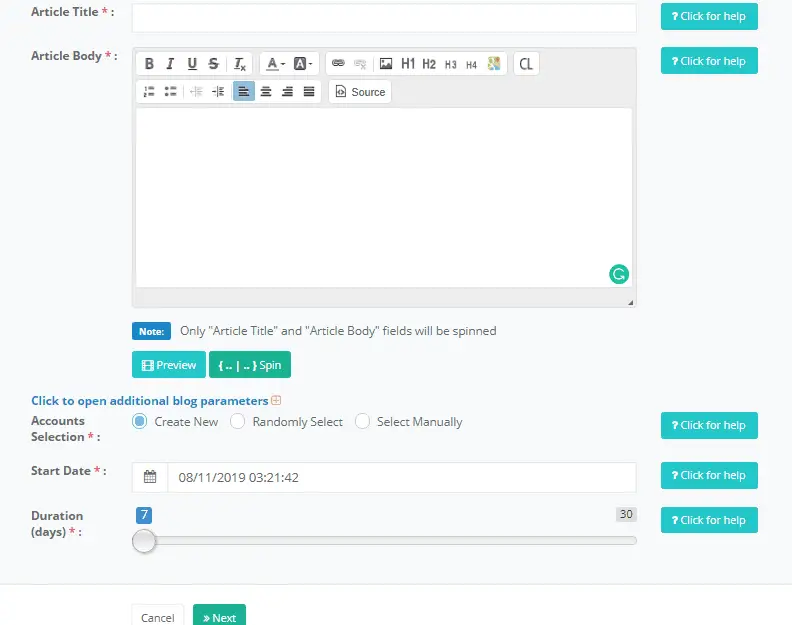
After you finish creating your article, select whether you want to create new accounts to submit your content to, or use existing accounts from your previous campaigns.
Then, select your campaign’s start date and specify how many days you want to drip the campaign for and hit Next.
On the following page, you have to select your backlink-building strategy. You’ll find the following template options in the dropdown menu:
- 1-Tier Campaign
- 2-Tier Campaign
- 3-Tier Campaign
- Blogs and Bookmarks
- Blogs and Status
You’re also able to create your own strategy if you want. Here’s what the 1-Tier Campaign option looks like:
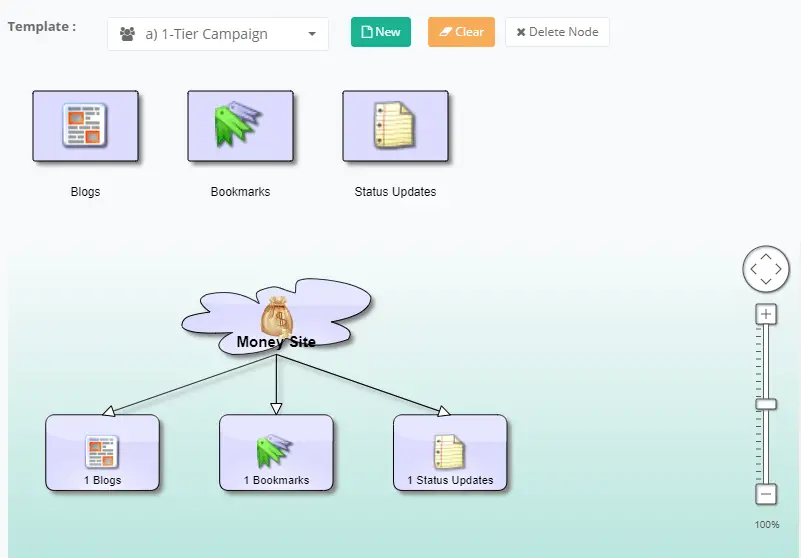
After making your selection, click Complete. Now, RankSnap will help you create backlinks for your page so you can improve your search engine rank.
The outcome:
For each video, I ran three campaigns over a period of around four months. In the end, one of my keywords made it to the first page of Google whereas the other two did not.
Reflections:
Since one of my keywords did make it to page one, this experiment wasn’t a total failure. Nevertheless, I don’t think this product lived up to its claims and it didn’t meet my expectations. There was a decent amount of work involved, writing the spinnable articles and status updates, and those processes had to be repeated three times. Overall, I think this product involved more work than it was worth.
Failed experiment #2: RankReel
The premise:
The premise of RankReel is similar to RankSnap. It’s another tool used to improve your rankings on both Google and YouTube. RankReel deals specifically with videos, though, whereas RankSnap claims to help you improve the rankings of anything. So my goal here was, once again, to rank my videos on the first page of both Google and YouTube.
What I did:
I purchased RankReel for $31 and chose three of my old YouTube videos to rank for and specified one target keyword for each video.
There are a few ways you can use RankReel to improve your videos’ ranks. But the first thing you have to do is generate a Google key, add Custom Search API and YouTube API, and integrate all of that in RankReel.
RankReel provides you with both video training and a PDF detailing how to complete these processes. But, in my case anyway, none of these processes were smooth sailing. It took many rounds of communication with the support team to straighten everything out and several passes at getting these setups to function.
I will say, though, that the support team was generally quick to respond, pleasant to interact with, and each person I talked to did their best to help. Nevertheless, it was pretty frustrating and time-consuming.
But after finally setting up the Google key and APIs, I was able to move forward with RankReel. First, I used the Keyword Suggestions tool to find a variety of longtail keywords related to my target keywords. The keyword list also shows the keywords’ monthly search volume, suggested bid, and competition.

I chose 20-25 additional keywords for each video that had good search volume and profitability and a lower competition score.
The next thing I did was use the Competition Research tool to cross-reference each of the longtail keywords I chose to see how hard it would be to rank for these keywords on YouTube and Google.
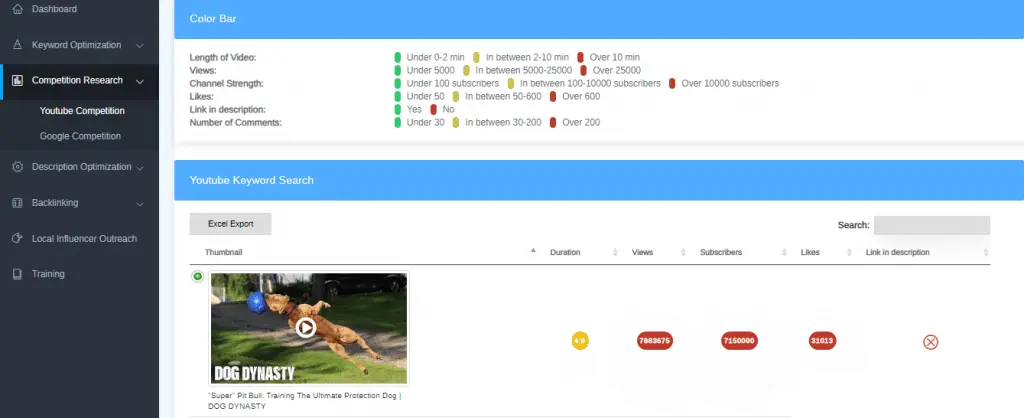
I narrowed down the keyword list to include only those categorized as either green or yellow (meaning they would be easier to rank for).
(NOTE: I didn’t have a ton of options with these. You might have better luck with a different set of longtail keywords. You might find more keywords in the green and have an easier time ranking your videos than I did.)
The next step was to go in and actually optimize my videos using the keywords I chose.
RankReel has a feature that lets you auto-generate descriptions for your videos, which sounded cool at first and like it could be a real time-saver, especially if you have a lot of videos to optimize. In practice, however, this feature wasn’t useful at all (or not for my videos anyway). There was no category that fit what my videos were about and there was no way to add a custom category.
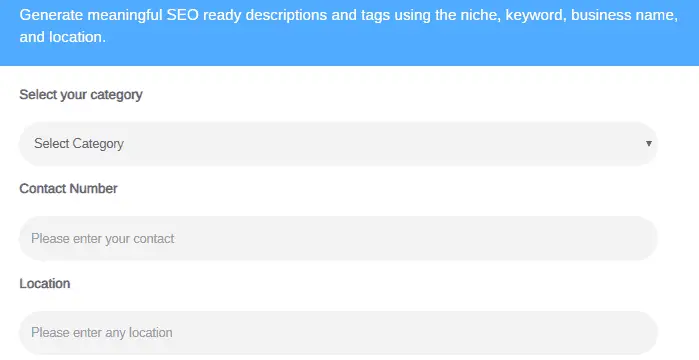
As you can see, the list of categories is pretty limited:
- Plumber
- Child Care
- Dog Training
- Pizzeria
- Real Estate Agent
- Divorce Lawyer
- Florist
- Dentist
- Automotive Repair
- Wedding Planner
- CPA
- Personal Lawyer
It would seem that RankReel mostly caters to videos for specific services, so it isn’t necessarily ideal for promoting ecommerce product videos.
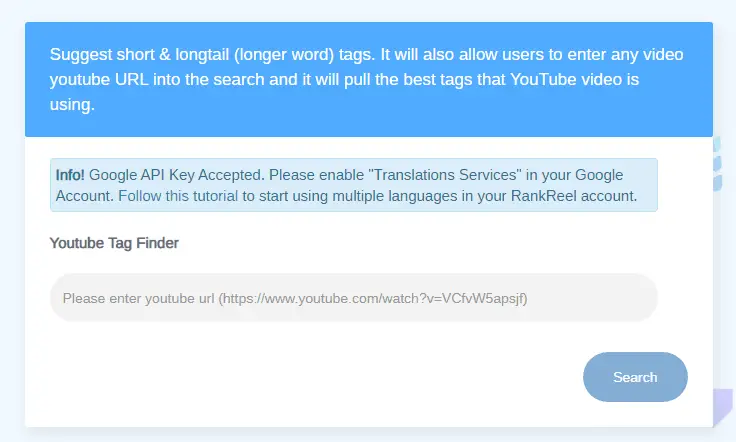
So instead of having RankReel create descriptions for my videos, I created the descriptions myself, incorporating the keywords RankReel helped me narrow down as well as the tags it helped me find using the Longtail and YouTube Tags Finder features. The goal here was to optimize my videos’ on-page SEO.
With the Longtail Tags Finder feature, you input a general keyword that relates to your video. Then, the tool finds longtail tags that you can use in your videos’ descriptions to help improve their ranks.
Similarly, you can use the YouTube Tag Finder feature to find more tags to include in your videos. To use this feature, just paste in the URL from a well-ranked and relevant YouTube video. RankReel then “swipes” the tags used by that video so you can use some of those same tags in your own video description.
The last notable RankReel feature I tried is the social bookmarking feature. This feature is supposed to let you connect a bunch of different social accounts so you can quickly and easily publish and promote your videos to each one. There was some kind of ongoing issue with this feature, however, which made it unusable.
The outcome:
This experiment yielded mixed results. Some improvements were made to my videos’ ranks, but I didn’t come as close to my goal as I had hoped. Here’s a breakdown:
Google search with quotes around the keyword
Only one of the keywords showed up on the first page of Google.
Google search without quotes
None of the keywords showed up on the first page of Google.
YouTube search with quotes around the keyword
All three of the keywords made it to the first page of YouTube.
YouTube search without quotes
Two of the keywords made it to the first page of YouTube.
As you can see, I got better results with my YouTube rankings than I did with Google. And depending on the search (my assistant got different results on her computer than I did on mine), I did actually rank in the top three YouTube search results for one of the keywords.
Reflections:
While the videos’ rankings did improve, especially for YouTube, the results weren’t what I was aiming for. Plus, people are more likely to conduct searches without quotes than they are with quotes. And only two of the keywords made it to the first page of YouTube without adding quotes, and none of the keywords made it to the first page of Google without adding quotes.
One thing I will say, though, is this software had an ongoing issue with Facebook that prevented me from using its social bookmarking feature. Maybe had I been able to use this feature my results would have improved. And so, it might be worthwhile to test this experiment again once that glitch has been worked out, although my assistant communicated with RankReel’s customer support for MONTHS about the status of the issue and it still hasn’t been fixed, which is a problem in and of itself.
Getting this tool set up and working properly took a lot of effort with little reward. So even though the social bookmarking feature could possibly improve my results (if the issue ever gets sorted out), I don’t want to invest any more time or effort into RankReel.
Failed experiment #3: Starting an Etsy referral program with OSI Affiliate
The premise:
My assistant found a blog post talking about how you can use OSI Affiliate software to set up a referral program for your Etsy shop and grow your sales. I initially loved the idea and was eager to try it.
What I did:
I signed up with OSI Affiliate for the 15-day free trial (after the trial, pricing starts at $47/month) using the link to one of my Etsy shops. Then, to set up the program, I followed the 6 steps laid out in the setup wizard, starting with…
Step 1 – Set Up
Here, you name your referral program and add your Etsy shop’s link.
Step 2 – Website
In this step, you customize your referral program sign-up page.

Step 3 – Socials
This step lets you customize what it looks like when someone shares your referral program on Facebook (this step is optional).
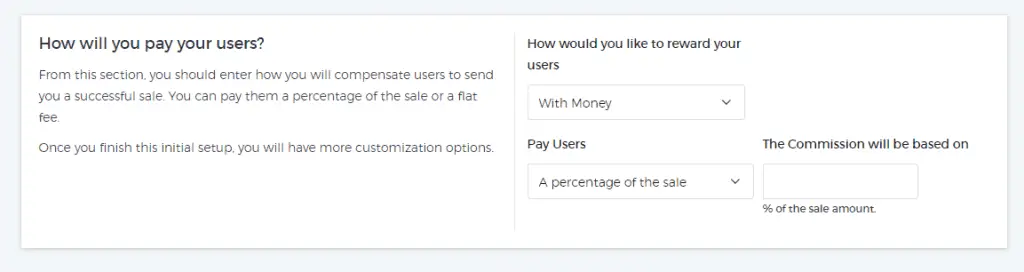
Step 4 – Commissions
Here, you specify how you will pay your program’s users.
Step 5 – Integrate
This is where you choose your ecommerce platform. I tried this software to create an Etsy referral program, but you can also create referral programs for a bunch of other platforms, including Shopify, Woo Commerce, and Big Commerce.
With Etsy, you need to follow special instructions because Etsy changed their APIs, so the integration method doesn’t work anymore. Instead, you need to create the promo code for each of your affiliates on Etsy and manually add the code to OSI Affiliate.
Step 6 – Launch
After configuring your affiliate program, you’re ready to launch. You get a unique link to your program, which looks something like this:
On your dashboard, you can view your monthly statistics:
- sales this month
- clicks this month
- impressions this month.
Plus, you can see who your top program users are.
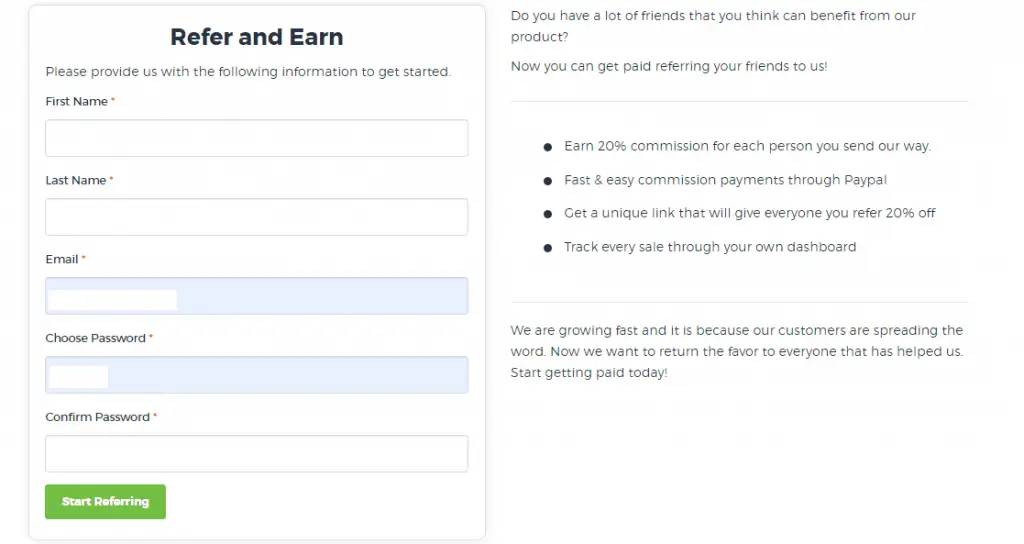
To promote my affiliate program, I added the following blurb to each of my Etsy product descriptions:
Be sure to check out our referral program: http://[shop name].ositracker.com/refer
– Earn 25% commission for each person you send our way.
– Fast & easy commission payments through Paypal
– Get a unique link that will give everyone you refer 25% off
– Track every sale through your own dashboard
We are growing fast and it is because our customers are spreading the word. Now we want to return the favor to everyone who has helped us. Start getting paid today!
The outcome:
Not a single person signed up for my affiliate program during the two-week trial. Maybe this would work over the long term, and/or if we reached out to a lot of people individually. It certainly wasn’t a quick success.
Reflections:
I could have paid to try the basic plan ($47 a month) to have the affiliate program active for longer. Maybe two weeks isn’t a long enough time to test this program. Doing that just didn’t seem worth it, though. When companies offer a trial period, users should be able to see some positive results, as getting results is what compels people to decide to purchase the service. And since that wasn’t the case here, I decided to call this one a bust without further experimentation.
Failed experiment #4: Moving inventory with liquidation websites
The premise:
In this experiment, I tried moving inventory that wasn’t selling well on Amazon using the liquidation website Source.com. I had originally wanted to try DirectLiquidation.com and Liquidation.com as well. But with Liquidation.com, the current retail value of each lot had to be over $5,000, which was way too much. And with DirectLiquidation.com, I couldn’t get my seller application approved (not sure what the issue was).
What I did:
I signed up as a seller with Source.com (free). Then, I tried selling a total of ten different lots, with each lot consisting of one case of 11 oz coffee mugs. The minimum auction starting price on Source.com is $99, so I started each lot at $100.
The process of creating a new lot is pretty easy:
Step 1 – Basic info

Step 2 – Manifest
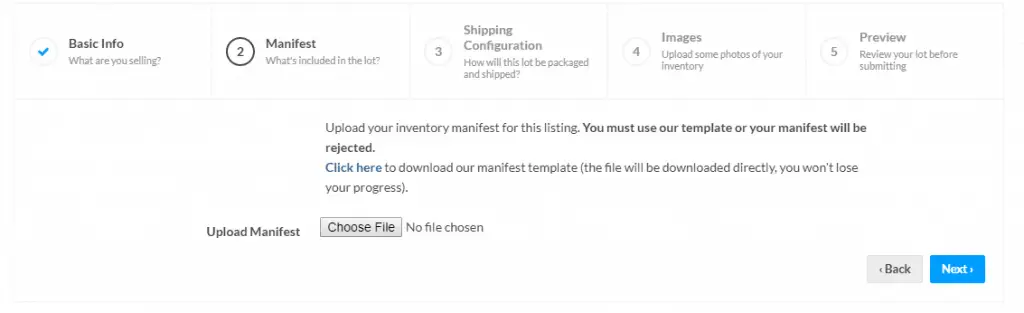
Step 3 – Shipping Configuration
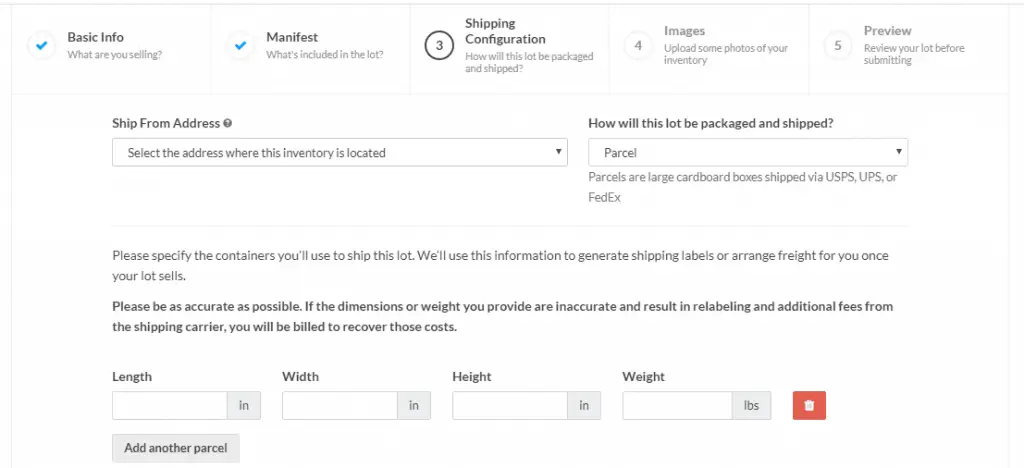
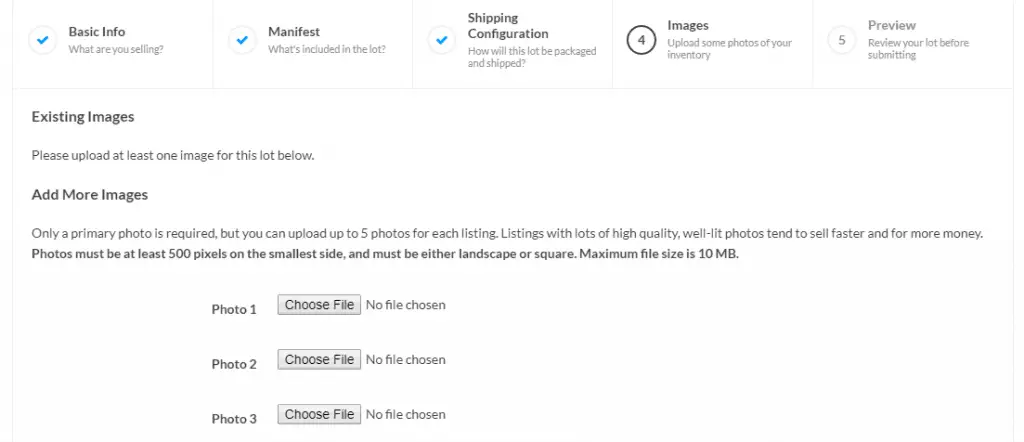
Step 4 – Images
Step 5 – Preview
Click Submit when everything looks good.
I did this for ten of my Amazon listings that hadn’t been selling well, with each auction lasting around five days.
The outcome:
I didn’t sell a single lot using Source.com. The highest number of views any of my lots got was 44. None of my lots, except for one, had any buyers watching it. And the one lot that did have buyers watching only had two people watching it. So I didn’t make a single cent with this case study, although I didn’t spend a single cent either.
Reflections:
You might have better results with different product designs. But honestly, I don’t think it’s worth trying since my results were so poor. Plus, I’ve tried this sort of thing in the past and it didn’t work well then either.
Failed experiment #5: Etsy’s Targeted Coupons
The premise:
Etsy has a feature that lets you send unique coupon codes to customers who either “favorite” your items or leave your items in their carts. The goal is to entice shoppers who show interest in your products to complete their purchases by giving them a discount.
What I did:
To enable this feature, here’s what you need to do:
- Log into your Etsy account.
- Click Shop Manager.
- Select Marketing, then Sales and coupons.
- Click + New special offer in the top-right corner.
- Choose Send offers to interested shoppers.
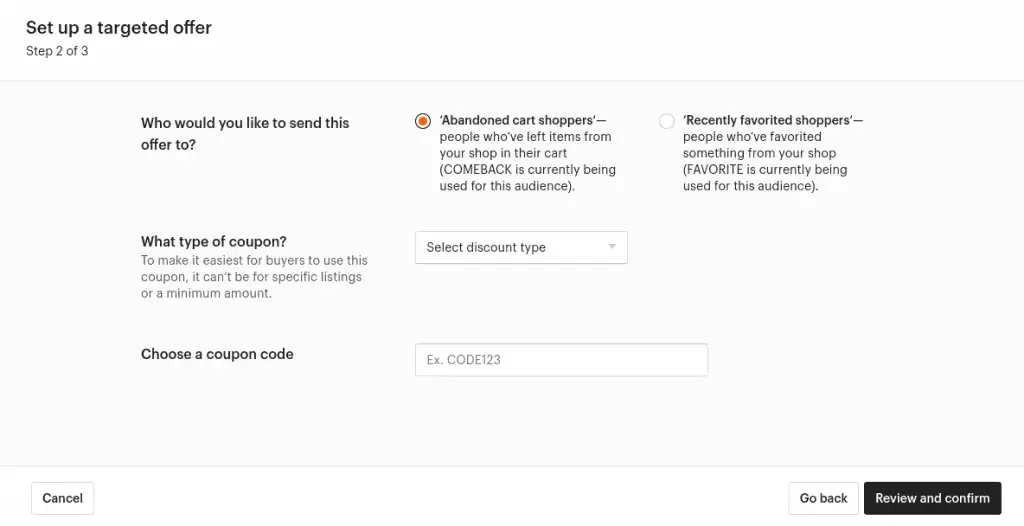
Abandoned cart shoppers
- Select your discount type: percent off, fixed amount off, or free standard shipping.
- Choose a coupon code, e.g. COMEBACK.
- Click Review and confirm.
- On the next screen, click Launch campaign.
Recently favorited shoppers
- Select your discount type: percent off, fixed amount off, or free standard shipping.
- Choose a coupon code, e.g. BUYNOW.
- Click Review and confirm.
- On the next screen, click Launch campaign.
After setting up one or both of these campaigns, you get the following message:
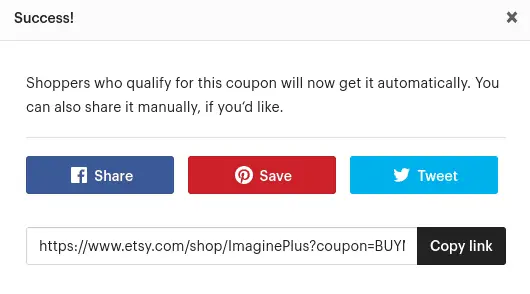
Etsy automatically emails shoppers with your discount code anytime shoppers favorite one of your items or leave one of your items in their carts. (You don’t have to do the emailing yourself, which is pretty great.)
These coupons never expire and they apply to all of the listings in your shop.
If you wish to edit the included listings, however, you can do so by scrolling down to the Individual sales and coupons section and clicking where it says See details and manage on the specific offer you wish to edit. This is also how you can deactivate your coupon if you no longer wish to offer a particular discount.
The outcome:
After running my two campaigns for more than six months, only one email was sent to someone who favorited one of my items.
Reflections:
Since only one email was sent, it would seem that not many shoppers leave my items behind in their carts, which is a good thing. And it would also seem that not many shoppers favorite my items either. Not favoriting my items might seem like a bad thing, but it isn’t necessarily. People don’t have to favorite your items to purchase them, so a lack of favorited items really isn’t a big deal.
Also, while I included this strategy as a failed experiment, I actually would still recommend setting up these two campaigns for your own Etsy shop.
I count the experiment as a failure since it didn’t yield any significant results. But this strategy takes less than five minutes to set up. There are no upfront costs. And you just never know when someone might leave an item in their cart or favorite something and then have one of these automatic emails sent with a coupon code that generates a bonus sale for you.
You might not ever see any results from this strategy (like me so far), but it doesn’t hurt to set it up and see!
What do you think of this list of failed experiments? Have you tried any of these products or strategies before? What kinds of results did you see? If you have any ideas about how to turn these case studies into success stories, please leave a comment below. Also, if you enjoyed this post, please consider sharing it.

Your next article should be about what “experiments” DID work… ;)
hi Rachel thanks for sharing your five experiment’s with us your reader I love your honesty and forth right views saves us money also impressed with the detail of each attest of those products not living up to there sales hype always save your pdf fantastic work thanks
Thanks for the adVice and the step bY step guides. Very interesting article. I will set up Etsy as suggested. I am a newbie and will see what works.