Customers often want to personalize their orders, especially on Etsy. They want items that are unique to them and their loved ones. And it can feel really great creating something that’s going to mean something to a customer and feel truly special.
However, it isn’t always clear how a customer should make a personalization request or how you, as the seller, should collect the necessary information about what the customer wants.
To make things easier, Etsy recently rolled out a new field that you can activate in your listings which enables customers to specify details about their personalized orders before they complete their purchases.
It’s up to you which listings include this field and what information is asked of customers to include.
I only recently learned about this option myself so I wanted to talk about it with you here in case you hadn’t heard about it either.
Below, I go over what you need to do to enable this field in your listings and I provide you with a sample script for what you can say in your personalization instructions.
Let’s dive in…
How to enable personalization on new listings
Inside your Etsy store’s Shop Manager, go to Listings and click Add a listing. Proceed as usual uploading pictures, titling your listing, selecting a category, etc.
But when you get to the section that says Can be personalized, select Yes.
In your description, you might want to talk about how the item can be personalized. You might say something like…
You can order our [keyword + product, e.g. pit bull blanket] as is with this [keyword, e.g. pit bull] image.
Or we can create a customized [product, e.g. blanket] for you featuring an image of any [keyword, e.g. pit bull] you want. It’s a great gift idea for the [keyword, e.g. pit bull] lover in your life.
Just upload a picture of your [keyword, e.g. pit bull] and we’ll put it on a personalized [product, e.g. blanket] for you.
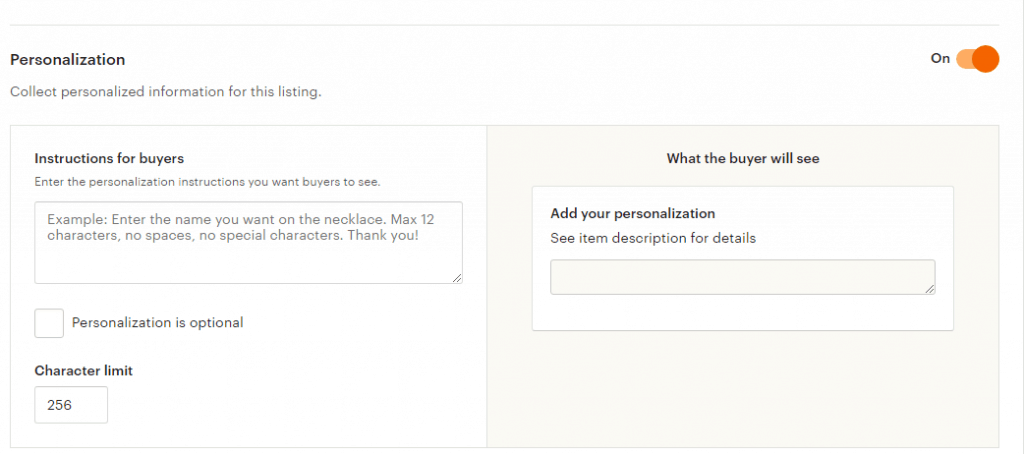
After filling in the description, production partner, tags, and inventory & pricing, there’s a Personalization section. Toggle the button on. Then, input your instructions for buyers.
Here’s what I’ve been putting (feel free to steal this):
Please upload the image you’d like to have on the product. The higher quality the image is, the better your personalized product will turn out! :)
(I typically check where it says Personalization is optional.)
How to enable personalization on previously listed items
If you have a bunch of listings you’d like to add a personalization option to, you can edit your listings in bulk, which is WAY faster than going back through each individual listing.
To do this…
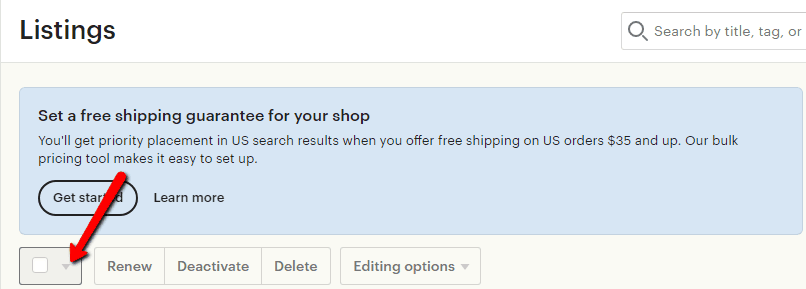
- Go to Listings.
- Select whichever listings you want to enable personalization for. Or click the checkbox to enable all of the listings on the page. Or click the down arrow next to the checkbox to select ALL of your listings.
- Click Editing options.
- Click Edit personalization.
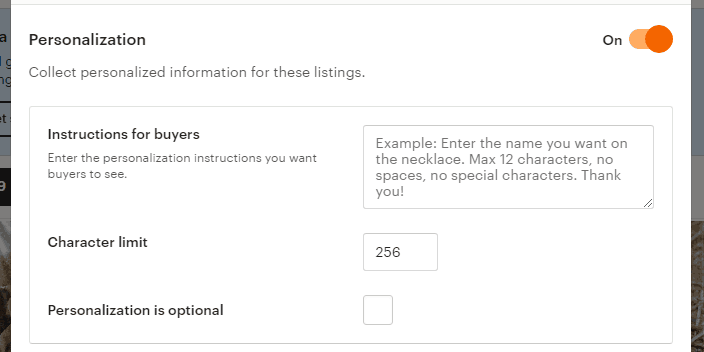
- Toggle the Personalization button on.
- Add in your instructions for buyers.
- Check Personalization is optional (if you want and it makes sense).
- Look over how your personalization appears in the sample update.
- If everything looks good, click Apply.
Now, all of the listings you selected will have the option to be personalized and include instructions for buyers on how they can do that.
Etsy customers love unique items. So enabling personalization and making the process as straightforward as possible is a great way to get more sales and minimize the back-and-forth between yourself, as the seller, and your customers.
I hope you found this post useful! Please leave a comment below to let me know what you think! And if you enjoyed this content, please consider sharing it with your friends and followers.

