Are you tired of creating listings that don’t seem to grab attention or lead to sales?
The good news is that amazing mockups can change everything. I am here to share some knowledge to help you create and source stunning mockups!
If you want your listings to catch eyes, spark interest, and make sales, then it’s all about mastering the art of mockups!
Whether you’re a pro seller or just starting out, nailing your mockups is one of the best ways to turn browsers into buyers. These 11+ tips will help you create scroll-stopping mockups that stand out and sell.
I’ve been in this space for quite a while now, and I’ve learned what works and what doesn’t through trial, error, and lots of testing.
As an experienced Etsy seller and member of Rachel’s team, I have put together the top mockup tips that I have come across, so that you can crush it in 2025 with your mockups and take your sales to the next level!
Let’s take a look!
1. Choose High-Quality Images
This might seem obvious, but it’s worth repeating—your images must be high resolution. Blurry or pixelated pictures can ruin a buyer’s first impression.
Think about it: would you buy from a listing that looks unprofessional? Probably not! High-quality images make your product look polished and trustworthy.
Pro Tip: Use tools like Canva or Photoshop to ensure your images are sharp and vibrant.
Note: GIMP and Photopea are free software applications that can be used instead of Photoshop with similar capabilities.
2. Show Your Product in Real Life
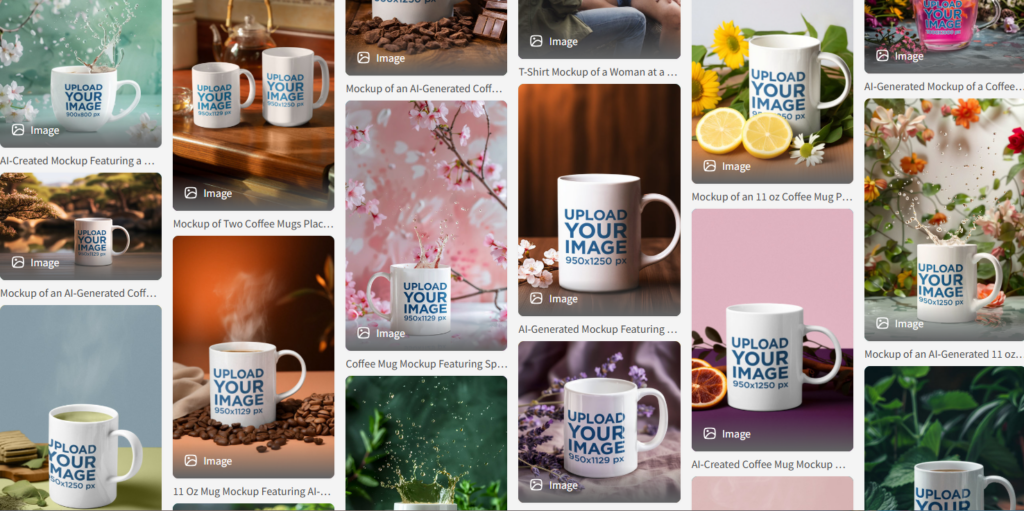
Lifestyle mockups are gold. They let buyers imagine themselves using your product, which helps them connect with it emotionally. For example, if you’re selling a mug, show it on a cozy kitchen counter with steaming coffee inside. People want to see how your product fits into their life!
Bonus Idea: Choose mockups with props or accessories to make the scene feel authentic and relatable.
Pro Tip: Find incredible lifestyle mockups of mugs, t-shirts etc. and even video clips of products in gorgeous environments on Placeit. Just upload your design to them and download the completed mockups to use in your listings.
Lifestyle images tell a story, and stories sell!
3. Keep It Clean and Simple
Too much clutter can overwhelm your audience. Clean backgrounds and minimal distractions keep the focus where it should be: on your product.
It might be tempting to throw every element you can think of into your mockups, but trust me on this one—less is more!
A solid color or lightly textured background can work wonders.
Why It Works: Simple designs are easier for the brain to process, which means shoppers can make faster decisions.
4. Highlight Key Features
Does your product have a standout feature? Show it off! If you’re selling a hoodie with a soft lining, create a close-up mockup that shows the texture. Buyers need to see why your product is better than the rest.
Try This: Use text overlays to highlight important details like available colors, 100% Organic Cotton or Stainless Steel.
Buyers love seeing:
- Quality details
- Unique features
- Close-ups of any standout design
The more informed customers feel, the more confident they are hitting that “Buy Now” button.
5. Use a Variety of Angles
One picture is not enough. People want to see all the details before they buy.
Include views like:
- Front, side, and back
- A zoomed-in detail shot
- The product in its packaging, if applicable
- Add a size chart or dimensions depending on your product
Aim to use all the available slots to add image mockups on your selling platform of choice.
Bonus Tip: Rotate your product in a 360-degree mockup or video for even more impact! This is completely optional, but worth considering adding as you become more advanced as an established seller.
6. Pick the Right Models
If you’re selecting mockups that include human models, they should resonate with your target audience. Selling kids’ t-shirts? Use kids in your mockups. Marketing leggings? Pick someone who looks active and energetic.
Pro Move: Diverse models can help you appeal to a broader audience and show inclusivity.
7. Stay True to Your Branding
Your mockups should reflect your brand’s vibe. If you’re all about fun and bold colors, don’t use a plain white background. Keep fonts, colors, and overall style consistent.
Why It Matters: A cohesive look builds trust and makes your store memorable.
Note: Branding is optional and not something that you have to focus on as a beginner. Initially aim to get your first sales coming in and then work on your shop’s branding as you grow your business.
8. Test Different Styles
Don’t be afraid to experiment! What works for one audience might not work for another. Try different types of mockups: flat lays, lifestyle photos, and even 3D designs if you want to. Track which ones perform best and focus on those.
Pro Tip: A/B testing is a game changer. Upload two versions of a product listing with different main mockup images and see which one gets more clicks. Just make sure that you make a change in the title for example, so that it does not appear to be the exact same listing. ;)
9. Add Text Overlays Wisely
Text overlays can be a double-edged sword. When done right, they’re a great way to share key information, like “New Arrival” or “Best Seller.” But too much text can feel cluttered.
Rule of Thumb: Use large, bold fonts and keep it short—5 words max!
Note: make sure that your online selling platform allows text in the mockup images. These rules can change periodically. Also, some platforms may allow overlays, but not in the main thumbnail image.
10. Optimize for Mobile
Most shoppers are browsing on their phones. Make sure your mockups look amazing on smaller screens. Avoid tiny details or crowded layouts that won’t translate well.
Quick Fix: Check your listings on both desktop and mobile before you hit publish.
11. Inject Personality
Want to really stand out? Add a bit of your personality to your mockups. If your brand is playful, include fun elements like doodles or emojis. If you’re more professional, stick to sleek and polished designs.
Pro Tip: Quirky touches can help your listings go viral on social media, too!
12. Avoid False Expectations
It’s crucial that your mockups accurately represent the actual product buyers will receive. Misleading or over-stylized images can lead to disappointed customers and negative reviews.
Avoid these pitfalls:
- Overediting colors
- Misrepresenting size
- Adding features not included in the final product
Transparency wins in the long run!
13. Use Mockup Tools to Save Time
Creating mockups from scratch is time-consuming. Tools like Placeit, Canva, Smartmockups, and Mockup Generator make it easy to create professional designs without design skills.
CustomHappy has absolutely stunning mockups available to members of Rachel’s courses and also a selection of free ones!
Why You’ll Love It: These tools often have templates specific to your niche, so you’ll save hours of work.
Call to Action: Make Your Next Mockup a Buyer Magnet!
There you have it—11+ insanely useful tips to level up your mockup game. Don’t settle for boring listings that get scrolled past. Use these tips to create mockups that grab attention and turn clicks into conversions.
What tip are you most excited to try first? Let me know in the comments below! Happy selling!
Looking for incredible mentors and the tools to start your own print-on-demand (POD) business, or are you ready to take your current business to the next level? Take a look at these excellent courses:
Low Hanging System
Dive into the most comprehensive online course designed to empower you to build an array of PROFITABLE income streams using simple designs and catchy sayings.
Learn how to design simple items and add them to marketplaces like Etsy and Amazon.
Low-Hanging AI
Two powerful bootcamps packed into one action-packed package designed to help you start, grow, or expand your Etsy and/or Amazon business – FAST.
It will be awesome to have you in the community! :)


