

I like to invest in new tools to optimize my business. Sometimes they work out well – other times, not so much.
And because I think it’s important to be as transparent as possible, I like to share not only my wins with you but also my fails.
I’ve done this several times in the past and people seem to appreciate it, so today I’m here with 2 more failed experiments to talk about, both involving video-ranking tools.
The two tools I tried were Lingo Blaster Captionizer and DFY Suite 2.0 Agency.
Below, I talk about how to use each tool and what happened after I gave them each a whirl.
Let’s take a look…
Lingo Blaster Captionizer
The premise behind Lingo Blaster Captionizer is you translate and “rankerize” your YouTube videos into different languages to target international audiences and then see an improvement in your Google and YouTube rankings as a result. Currently, this tool costs $37.
How this tool works
To use Lingo Blaster Captionizer, the first thing you need to do is add your YouTube account.
- Click the Add YouTube Account button
- Choose your YouTube account from the pop-up window
- Select your channel
Your YouTube account should now be added to Lingo Blaster and you can begin translating your videos.
Translate your videos
To do this…
- Select Translate Videos from the left-hand sidebar
- Choose the YouTube account you want to use
- Find the video you want to have translated (you can search for specific videos using the filter option)
If you scroll to the right, you’ll see Yes or No next to each video, indicating whether or not the video has already been translated.
For any un-translated videos you want to translate, just…
- Toggle the No button to say Yes
- Click Next Step at the top
- Select your video’s original language (most likely English)
- Choose the languages you want to translate your video into, including the title and description (you can pick up to 10 languages)
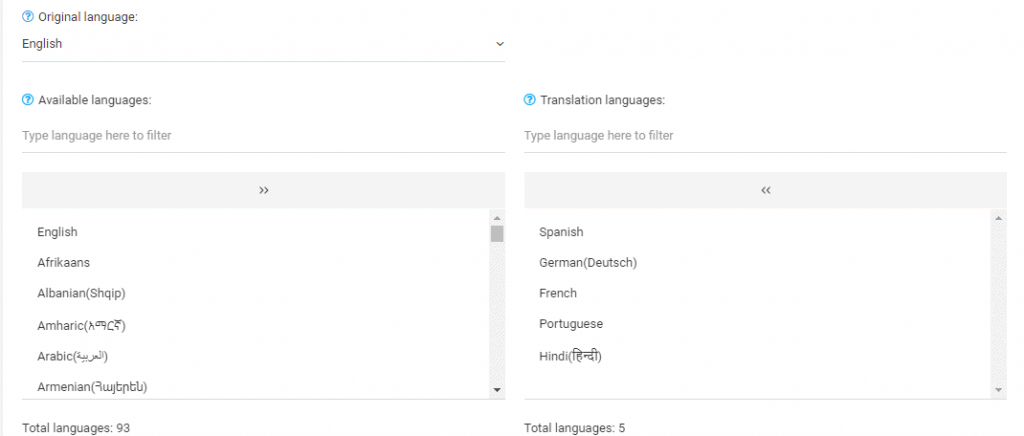
I chose the top 10 most spoken languages in the world as they were offered on Lingo Blaster’s list. They were as follows:
- Spanish
- German
- French
- Portuguese
- Hindi
- Chinese (simplified)
- Chinese (traditional)
- Arabic
- Russian
Then, click Next Step at the top.
On the next page, if there are any words or phrases (e.g. names, websites, course titles, etc.) you want to exclude from the translation process, you can type those in.
For example, some of my videos mention LowHangingSystem.com. I wouldn’t want that website to be translated because it’s the name of my course, and translating it would mess up the link.
During this step, you can also modify your video’s title and description if you so choose. And depending on the video, you might also encounter the option to…
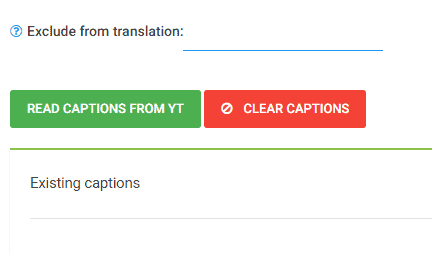
This option comes up when your video already has captions added to it. And in which case, click the green Read Captions From YT button then click Next Step.
Allow the tool to translate your video (this process can take between 5 seconds and 5 minutes). If you want to review any of the translations, click one of the languages listed at the top to see your video’s translated version in the specified language.
Once you’re satisfied with your translations, hit Publish, and the process is complete. Your video along with its translated title, description, and captions will be published to your YouTube account.
After translating a video, the next thing you can do is “rankerize” it. The rankerization process helps you get better rankings for foreign keywords.
Rankerize your videos
To do this…
- Click the Rankerizer option on the left-hand side (this will display all of your previously translated videos)
- Choose the video from the list that you want to rankerize by toggling the No button to say Yes
- Click Next Step at the top
- Click the green Rankerize button
NOTE: When you hit Rankerize, the following message will appear:
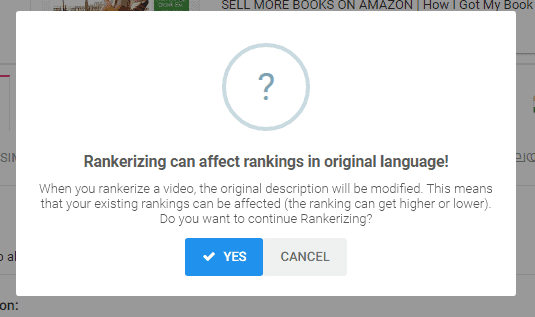
Click Yes if you agree to these conditions. Wait up to 60 seconds for the tool to load all of the languages and rankerize your video for foreign keywords then hit Close. You can also opt to view your video on YouTube at this point if you want.
My results
I used this tool to translate 30 of my YouTube videos. Before having my videos translated, I searched for the keywords I wanted to rank for with a particular video on Google and YouTube to see if my video showed up on page 1. In most cases, my videos did not show up on either page 1 of Google or YouTube.
After using this tool, my hope was that several (or most) of my translated videos would show up on the first page of at least YouTube and earn more views.
Unfortunately, this was not the case for the vast majority of my videos. In the end, only one of my videos that wasn’t already ranked on page 1 of YouTube made it there. And none of my videos made it to page 1 of Google. Also, this tool did not drive significant traffic to any of my videos.
Tracking my videos’ foreign keywords was hard to do since I don’t speak those other languages. But given that my videos didn’t receive a significant bump in views, I think it’s safe to assume their rankings for foreign keywords didn’t improve much either.
I think it’s pretty cool that lots of my videos are now accessible to people who speak different languages. But given the lackluster ranking and traffic results, overall, this tool wasn’t worth the investment, and I wouldn’t recommend it.
DFY Suite 2.0 Agency
This tool is a social syndication system that helps improve the rankings of your YouTube videos by building hundreds of social bookmarking and wiki links for you with lots of high-domain and page-authority.
How this tool works
Inside your dashboard…
- Click Campaigns on the left-hand side
- Click the green Create Campaign button at the top
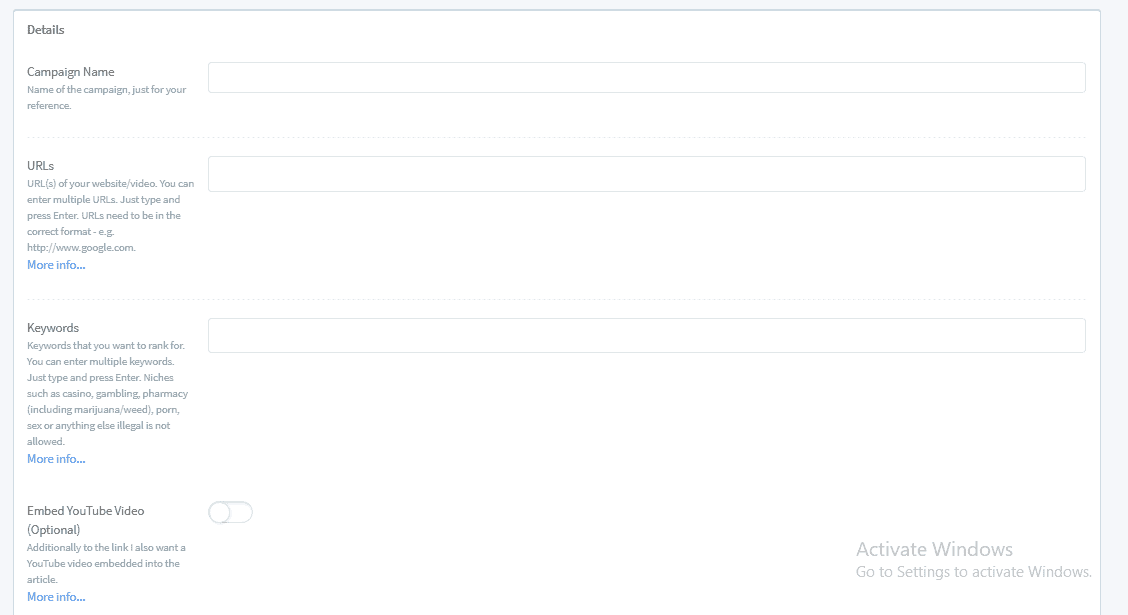
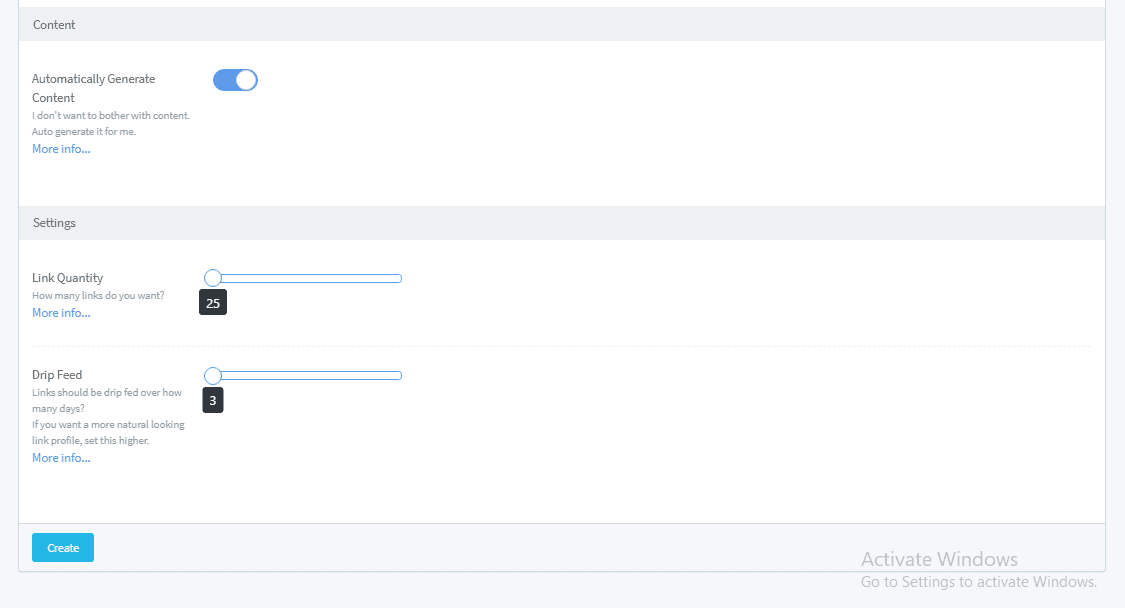
- Fill out your campaign’s details:
- Campaign name
- URLs (your video links)
- Keywords you want to rank for
- Content – You can choose to have this automatically generated or you can create the content yourself. I wanted this process to be as hands-free as possible so I opted to have the software create the content for me.
- Link quantity – I chose the maximum number: 200.
- Drip feed – I opted to have the links drip-fed over two weeks.
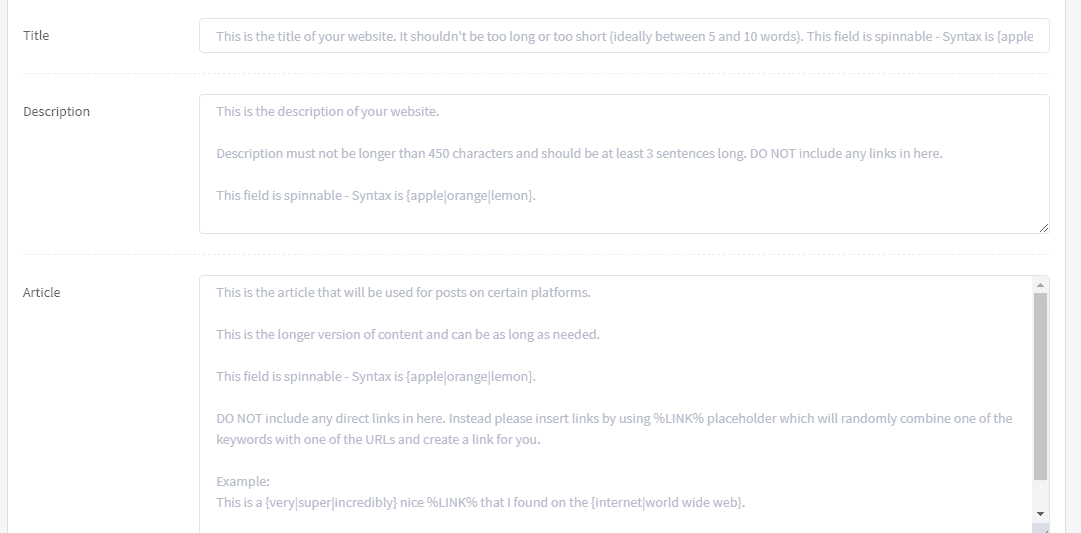
NOTE: If you do decide to create the content yourself, this is the screen you’ll see letting you know how to proceed. (You’ll need to enter the title, description, and then the content itself.)
After filling out all of your campaign’s details, click Create, and you’re good to go!
This tool operates with a credit system so you can create as many campaigns as you have credits for. I ended up running 16 unique campaigns.
My results
I ended up using mostly the same YouTube videos here that I’d tested with Lingo Blaster Captionizer. None of these videos were ranked on page 1 of either Google or YouTube at the start of the experiment.
If you click on the Campaigns section of your dashboard, you can check your campaigns’ progress and download a report to see all of the links.
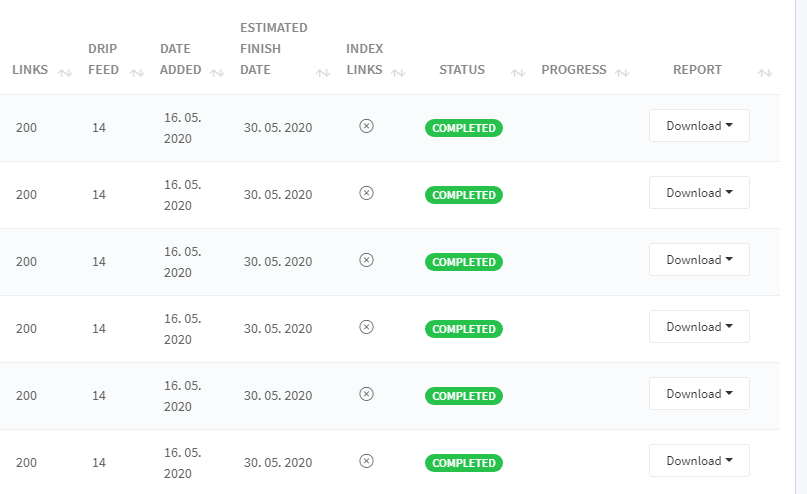
Unfortunately, at the end of the two weeks that my campaigns ran for, none of the videos ended up on page 1 of Google or YouTube. So I can’t recommend this tool for video-ranking purposes either.
Maybe I would have seen better results if I’d created the content myself. But that would have taken quite a bit of time and effort and I thought the software would be handling the bulk of the heavy lifting.
What are your thoughts on these failed experiments? Have you tried any tools or software lately that didn’t pan out? Any that DID? Let me know about your experiences in the comments below. And if you enjoyed this post, please share it with your friends and followers.