YouTube can be a great traffic generator – especially when you know how to maximize its potential with their hidden features.
In this post I’m going to share some different tips you can use to boost engagement and give people a better overall experience with.
The information here doesn’t necessarily pertain to the Low Hanging System, but it’ll be helpful for once you graduate to your own store and create promotional videos.
And of course if you want to test sending videos of your products for SEO (as I talk about in this video), this should be very helpful for you.
(Also, here’s an infographic describing these hacks and special tips that you can download or pin on Pinterest if you’d like.):
Download the infographic here or pin on Pinterest here.
And here’s a bit more detail:
1. Create links that skip to specific points in the video
This makes it easier for viewers to move to important clips from your videos so they don’t have to fast forward.
To create links to specific points, you have two options…
Strategy 1
- Go to your YouTube video
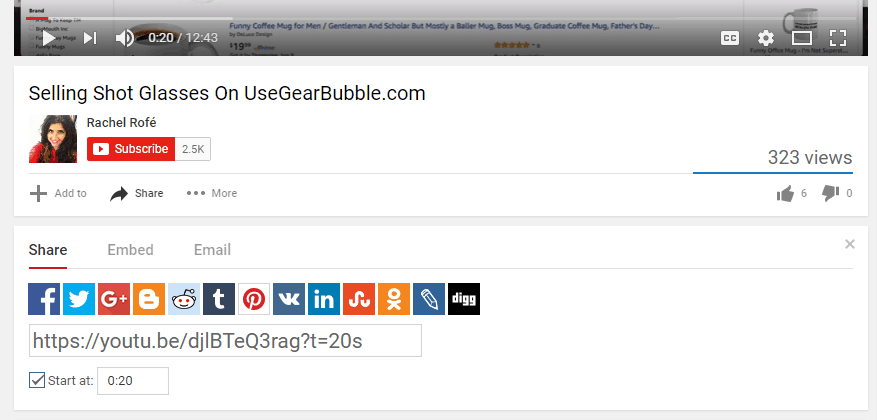
- Click “Share” under the video’s title
- Select “Share” again from the 3 options that appear
- Check the “Start” box
- Enter your desired start time (you can also pause the video at the exact moment you want to link to and the start-time box will automatically update)
- A title tag will appear at the end of the link (in the example below, the tag is ?t=20s).
- Copy the link and share it.
Strategy 2
- Pause your video at the point you want it to auto-play from
- Right click your video
- Select the “Copy video URL from current time” option from the pop-up box that appears
- Your specified start-time link will then be copied to your clipboard; you can share it from there.
2. Include written transcripts
Written transcripts improve your videos’ SEO.
To include a transcript…
- Go to your YouTube video
- Click the CC “Subtitles/Closed captions” icon on the bottom right of your video
- Set your language to whatever works best for your audience.
You have four options for how to add subtitles or closed captions:
- Upload the transcript (to learn which files are supported, click here)
- Type or paste in your video’s subtitles where the timings will automatically be set
- Type in your video’s subtitles as the video plays with you watching it
- Pay someone to transcribe your video for you.
3. Add playlists to your YouTube channel
Playlists allow you to sort your videos by category, enabling viewers to find and share videos matching their specific interests.
To add a playlist…
- Go to the “My channel” page of your YouTube account
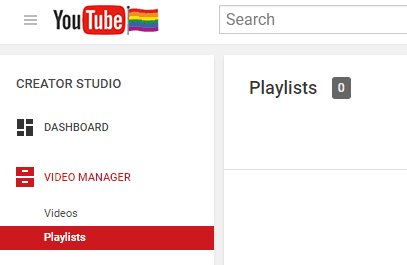
- Click “Video Manager” at the top
- On the left-hand sidebar, click “Playlists”
- Click the “New playlist” icon on the right-hand side
- Title your playlist, opt to make it public, hit create.
If you want, you can even invite viewers to collaborate on your playlists.
How to invite viewers to collaborate:
- Visit your playlists page, which can you find by first going to “My channel,” then clicking ”Video Manager” (same as steps 1-2 in strategy #1)
- Choose the playlist you want to add viewers to
- Click the “Playlist Settings” icon (to the right of your playlist’s thumbnail)
- Choose “Collaborate”
- Turn on the “Collaborators can add videos to playlist” option
- Then, send the link to anyone you’d like to be a collaborator on your playlist.
4. Add an end screen to promote your other videos
End screens are images that show up during the last few seconds of a YouTube video, with the purpose being to advertise other videos or content. End screens are beneficial because they help boost engagement.
To add an end screen…
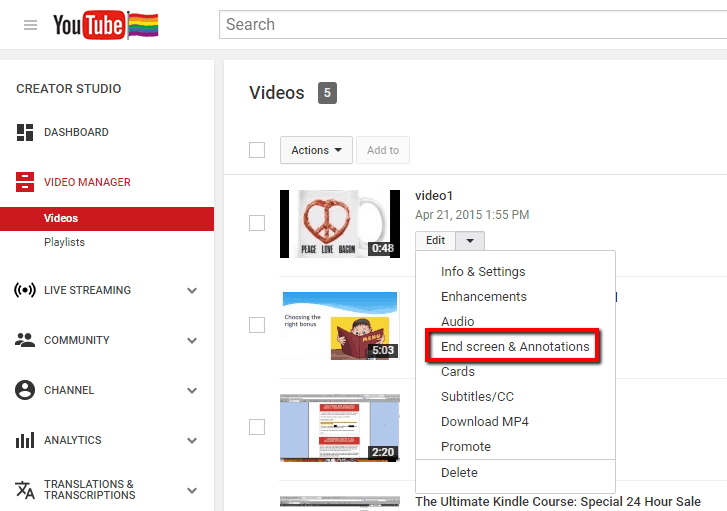
- Click your “Video Manager”
- Click the “Edit” button on the video you want to modify
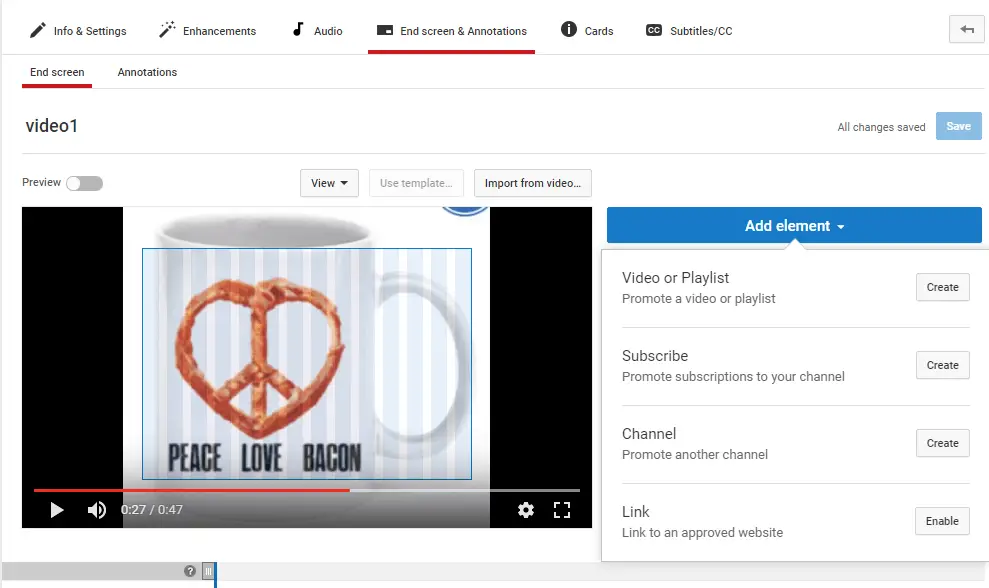
- Select the choice that says “End Screen & Annotations.”
Then, you’ll find several options for how you make your end screen appear:
- You can add an element, such as a video or playlist, subscription, channel, or link
- You can import from another video – just copy the end screen from one of your other videos and import it to your current video
- You can use a template – Google includes a bunch of end screen formats that you can work with.
5. Create a custom URL for your YouTube videos
A custom URL makes your YouTube channel easier for viewers to recall. But there are certain criteria you need to meet in order to do this.
You need to…
- Have more than 100 subscribers
- Have a channel that’s more than 30 days old
- Use an uploaded photo as your channel’s icon
- Include uploaded channel art.
But as long as your channel meets these four specifications, you’re good to go.
To create a custom URL…
- Click your YouTube page’s Channel settings icon (the gear)
- From there, click “Advanced settings”
- Then, as long as your channel is eligible, you’ll view a “You’re eligible for a custom URL” prompt
- “Get a custom URL” will pop up, showing you a Google-approved custom URL
- Click where it says “Claim here,” then agree to the TOS (NOTE: Your custom URL can’t be changed once it’s created, so make sure you’re happy with it)
- Hit “Confirm choice.”
6. Add royalty-free sound effects and music
Sound effects and music make your videos more entertaining. You just need to be careful of audio copyright infringement.
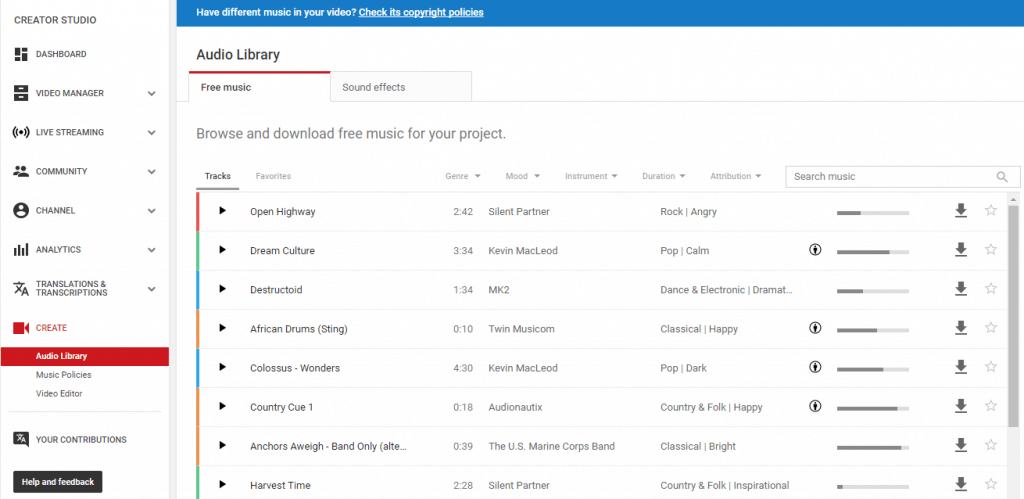
Fortunately, YouTube’s Audio Library has tons of sounds and music that are totally fair-game for you to use.
To add sound effects and music…
- Make sure you’re signed into your YouTube account, go to your Creator Studio
- Go to “Create” on the left-hand sidebar, click “Audio Library”
- You’ll be directed to a page with a wide selection of free music and sound effects
- Once you find something you like, click the track’s download arrow on the far left and save it to your device.
Here are 4 additional Creative Commons music resources for your videos:
(NOTE: Not every track on these sites is up for grabs. But each source includes a decent selection of royalty-free music and sounds.)
7. Turn your video into a GIF
This is a fun and easy way to repurpose your video content and make it more shareable.
To turn your video into a GIF…
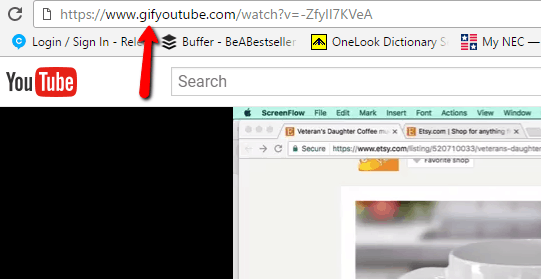
- Go to the YouTube video you want to turn into a GIF
- Change the video’s URL from www.youtube.com/yourvideo to www.gifyoutube.com/yourvideo
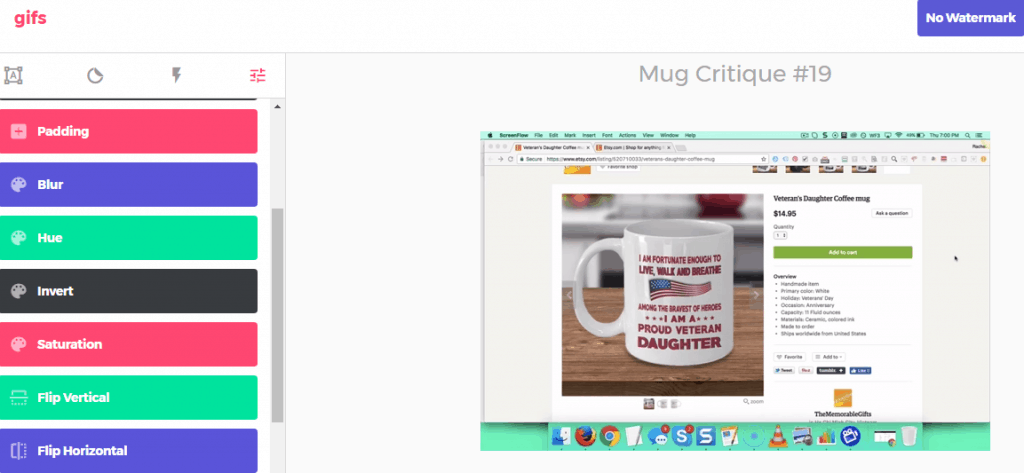
- From there, you can do a ton of different things, such as add captions and stickers, crop, or use blurring, saturation, or padding effects.
8. Save videos to watch later
Whether you’re at work or busy doing research online, you’re not always at liberty to watch YouTube videos. So the ability to save videos for later viewings is really useful.
To save videos…
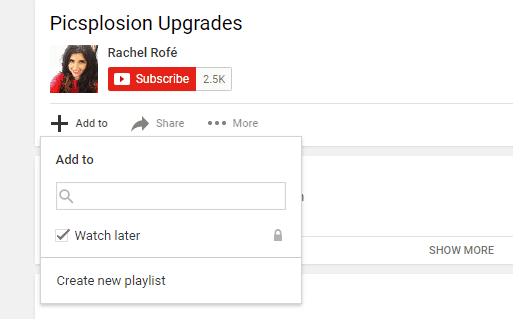
- Go to the video you want to earmark for later
- Click the “+ Add to” icon beneath the video’s title
- Hit “Watch later” from the pop-up box.
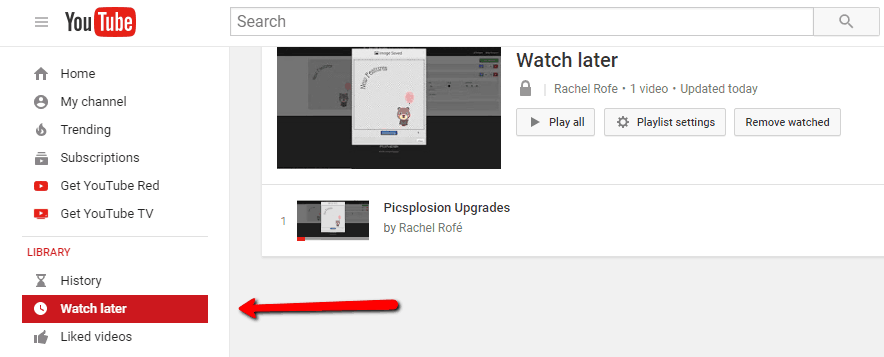
When you’re ready to view your saved videos, go to your YouTube channel’s homepage, click the three horizontal bars on the top left-hand side, then click the “Watch later” option.
9. Create slideshows and set them to music
Video creation isn’t everyone’s forte. But that doesn’t mean you can’t still benefit from creating great visuals and adding them to YouTube. Slideshows are one way to do this.
To create slideshows…
- Go to your YouTube dashboard and click the upload button on the top right-hand side (look for the upward-pointing arrow with a horizontal line beneath it)
- A screen will appear that says “Select files to upload”
- Under where it says “Photo slideshow,” click “Create”
- Select and upload the photos you want to include in the slideshow
- When you’re done, click “Select” at the bottom left
- Drag and drop your images to put them in the correct order
- Click “Next” once you’re satisfied
- From there, you can preview your slideshow
- Adjust YouTube’s default settings to customize your slideshow (e.g. slide duration, slide effect, and transition)
- Select a music track under where it says “Audio” (you can also check “No audio”)
- Hit “Upload.”
10. Add a YouTube card to your video
YouTube cards operate like pop-up boxes, serving to draw viewers’ attention to a related thing they might be interested in (another YouTube channel or video). YouTube cards are another great way to boost engagement.
To add a card…
- Click your channel icon located at the top right
- In the box that pops up, click “Creator Studio”
- Select the “Video Manager” option from the left-hand sidebar
- Choose the video you would like to add a card to and click the arrow next to the “Edit” button
- Select “Cards” from the drop-down menu
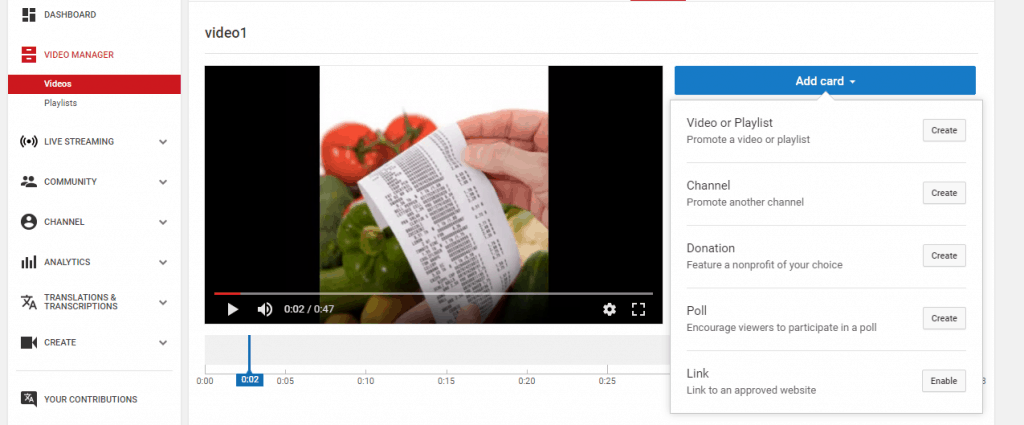
- Click the blue “Add card” button
- Choose the kind of card you want to add (video or playlist, channel, donation, poll, or link)
- After creating your card, you can position it at the point in the video where you want it to appear.
I hope you found this post useful! Let me know what you think of these YouTube hacks and if you have any others to share in the comments section below.

