If you’re new to the Low Hanging System and the world of print-on-demand, let me ask you… do you want to start your own Amazon business? Building an Amazon ecommerce store is a fantastic way to start a business with little money upfront. With an Amazon store, you can showcase unique POD products and connect with a global audience.
Don’t worry if you don’t have experience with ecommerce or only a little money to invest. In this post, I share a step-by-step guide to help you launch your Amazon store as quickly and effectively as possible.
Let’s take a look…
Step 1: Start your own Amazon business by choosing a niche
If you’re unfamiliar with the term “print-on-demand” (POD), it’s a nifty business model that lets you sell various items on Amazon (e.g. coffee mugs, shot glasses, or even Christmas ornaments).
What’s cool about POD is you don’t need a stockpile of products ready to go. POD lets you start your Amazon journey without the hassle of inventory. When a customer places an order from your store, a third-party supplier, like CustomHappy, takes over. They manufacture the order and ship it straight to your customer. They even take care of returns and exchanges.
So when you’re ready to start your own Amazon business you need to brainstorm what your store’s going to be about. What products will you feature, and what designs will put on them? Answering these questions acts as your guide, helping you carve out your niche (or your store’s specialized topic).
Let me break it down for you. Say, for example, you really love cats and think you can come up with lots of great cat products. You can create a store dedicated to all things cat-related, and cats becomes your store’s niche.
Remember, you can always diversify down the line. But when you’re just starting, it’s helpful to have a focal point. Your niche is like your shop’s map, giving you a clear direction and plan.
Need some help pinpointing a great niche for your store? Here are some tips:
What are your interests, hobbies, and passions?
When you’re learning how to start your own Amazon business and find a niche, begin by thinking about your passions and hobbies. What topics do you find interesting? What makes you smile or laugh? For example…
- Friends and family
- Cats
- Playing the guitar
- Politics
- Travel
- Hunting and fishing
Think about things you’re passionate about and how you could turn those passions into products and designs.
What’s trending on Amazon?
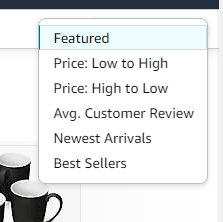
Another great strategy is to research current bestselling items on Amazon. Search for the items you want to sell in your store (e.g. coffee mugs). Next, sort by Best Sellers and see if you can spot any common themes. Then, see if you can identify any potential gaps in the market that your store could fill.
Who is your target audience?
In other words, who are your potential customers? Consider factors like age, gender, location, interests, and lifestyle. What does your target audience look like, think about, or enjoy doing in their spare time? Where do they live? How old are they? Understanding your target audience helps you tailor your products and marketing efforts more effectively.
Step 2: Build your store and run your Amazon business from home
After selecting a niche, you should have a better idea of the kind of Amazon store you want to create. Now it’s time to really dig in…
How to become an Amazon seller and create your shop
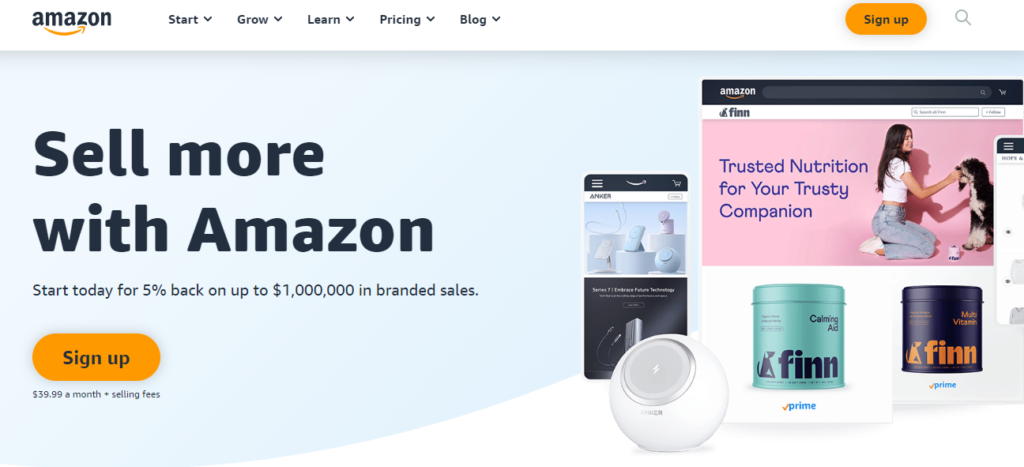
If you don’t have an Amazon Seller Central account, you can sign up for one here. If you already have an account, log in…
Set up your Amazon store
- Go to the Amazon Seller Central website
- Click on “Sign Up” or “Start Selling” to begin the registration process
- Enter your business information, including your business name, address, phone number, and email address
- Choose whether you want to register as an individual seller or a professional seller. (Individual accounts are suitable for those planning to sell fewer than 40 items a month, while professional accounts are for those with a larger volume of sales.)
- Enter your preferred payment method and bank account details for receiving payments from Amazon
- Verify your identity by providing the necessary personal information or business documents, such as your identification and tax information
- Read and accept the Amazon Seller Agreement, as well as any other relevant policies
- After providing all the required information, submit your registration
Create your Amazon seller profile
Customize your seller profile by adding a logo and business description. Your business description should be compelling and informative. It should highlight your brand’s story, mission, and the unique value your products offer. Use this space to connect with potential customers and build trust.
Step 3: Create designs for your Amazon FBA and FBM print-on-demand products
Design creation is the essence of your Amazon business. Every fresh design and product you introduce presents another chance for customers to choose your items. My advice is to embrace a “throw spaghetti at the wall” strategy for design creation. Predicting what will strike a chord with your target audience can be tricky. So maintaining a diverse inventory is a smart move.
When it comes to design, simple is always best. I suggest focusing on text-based designs using a single, easy-to-read black font. These types of designs typically appeal to a broader audience.
To find loads of great tips for design inspiration, click the links to the blog posts below:
Your ultimate list of AI-generated prompts for new POD design ideas
How to use your favorite news source to get design ideas to sell on Etsy and Amazon
Turn current trends into fantastic, new design ideas for your ecommerce store
Creating new design ideas – A compilation of effective strategies
Step 4: Research successful Amazon shops in your niche
As part of learning how to start your own Amazon business, research successful Amazon shops in your chosen niche. Doing so can give you insights and ideas that can help you grow your Amazon store. You can get a better idea of how to title your listings, write descriptions, and more.
To research successful Amazon stores…
Keyword search on Amazon
Use relevant keywords related to your niche in Amazon’s search bar to find top-selling products and stores in your niche. Analyze these stores’ product listings and customer reviews.
Explore best-seller rankings
Check the Best Seller lists on Amazon to identify the top-performing products in your niche. Study the strategies these Amazon sellers use in their product listings, pricing, and customer engagement.
Read customer reviews
Look at customer reviews and feedback for products in your niche to understand what customers appreciate and what aspects they find lacking. This can help you identify opportunities to improve your offers.
Step 5: Set up your product listings on Amazon
If you want to start your own Amazon business, you need to create product listings. Creating an Amazon product listing takes several steps.
Here’s how the process works:
- Log in to your Amazon Seller Central Account
- Navigate to “Inventory” and Select “Add a Product”
- Find the “Inventory” tab and click on “Add a Product” to begin creating a new product listing
- Select the appropriate product category and subcategory that best fit your product
- Provide thorough product details, including the product title, key features, description, and any relevant specifications (e.g. 11 oz, 15 oz, etc.)
- Upload high-resolution images of your product from various angles, highlighting its key features and details
- Determine the pricing for your product, taking into account factors such as production costs, competition, and market demand
- Set up shipping options, including fulfillment methods (Fulfillment by Amazon – FBA; or Fulfillment by Merchant – FBM) and shipping rates for different regions
- Incorporate relevant keywords in your product title, description, and bullet points to optimize your product listing for search visibility
- If your product comes in different sizes, colors, or other variations, create product variations to provide customers with options to choose from
- Craft persuasive and detailed product descriptions that highlight your product’s benefits, features, and unique selling points. Use language that resonates with your target audience and encourages them to make to buy.
- Before publishing your product listing, review all the details to make sure everything looks good
Step 6: Add engaging images to your product listings
Your products’ images are what’s going to sell your products. You should include images that show your products from different angles (e.g. front and back). Plus, you should consider adding an image that shows your product’s design up close as well as lifestyle images that show your products in use. That way, customers can envision what it would be like to own your items.
To help you create engaging product images, you can find my collection of product mockups, including lifestyle images, on my Resource List. Look under the Mockups section.
You can include these mockups in your Amazon listings to make your listings more engaging and appealing to shoppers.
Step 7: Determine your products’ prices
Determining the best price for your Amazon products is crucial for maximizing sales while maintaining profitability. Here are some pricing tips:
- Conduct a thorough analysis of your competitors’ pricing for similar products
- Calculate all the costs associated with producing, marketing, and selling your products. Factor in overhead costs, shipping expenses, and Amazon’s fees to determine a price that ensures profitability
- Assess the unique value your product offers to customers compared to similar products in the market
- Occasionally offer promotional pricing, discounts, or special offers. That way, you attract new customers and encourage repeat purchases
- Factor in Amazon’s selling fees and referral fees when determining your product prices. Ensure that your pricing accounts for these fees to maintain a healthy profit margin
Step 8: Optimize your Amazon product listings
As you learn how to start your own Amazon shop, you should know how to optimize your Amazon listings. I don’t think this is crucial for “low hanging” listings. But as you scale up, listing optimization can be important for…
- Improving your listings’ visibility
- Attracting more potential buyers
- Increasing your chances of making sales
Here are several strategies to help you optimize your Amazon listings:
Perform keyword research
Conduct thorough keyword research to identify relevant and popular search terms within your niche.
To find high-performing keywords, use tools like…
- Google Keyword Planner
- Amazon’s search bar
- Third-party keyword research tools, like KeySearch
Create effective titles
Include your primary keywords in your listing title while making sure the title remains clear and concise. Highlight the key features of your product in the title to catch the buyer’s attention. And pay attention to Amazon’s specific requirements and tips for creating awesome titles:
Title requirements

Title tips

Write detailed descriptions
Amazon’s algorithm takes into account the words you use in your products’ titles and descriptions when determining which products to show first in the search results. Therefore, you should include relevant keywords in your descriptions to help your Amazon print-on-demand products show up higher in the search results. That way, you can get more sales.
Just don’t go overboard with the keywords and “keyword stuff.” Your descriptions should always be readable.
Use bullet points
Use bullet points in your product descriptions to break down information and make it easily scannable. This helps buyers quickly find the details they’re looking for and it improves your listings’ readability.
Create variations and customization options
If your product has variations (e.g. different sizes or colors), make sure you provide clear options for buyers to choose from. Also, highlight any customization options available. Customers love customization!
Step 9: Develop a seamless customer service process
Creating a smooth customer service process for your Amazon business is really important. Customer service is everything.
Determine the communication channels through which your customers can reach you. Amazon allows you to handle customer service interactions via email. But you could also consider developing a social media presence and allowing your customers to contact you through those accounts.
For each communication channel, establish clear response time expectations. This could be within a few hours or by the end of the next business day. Response times should never take more than 24 hours.
I also recommend creating scripts for common customer inquiries, such as…
- Shipping updates
- Product information
- Return and exchange policies
These scripts can save you time and energy while maintaining consistency with your responses. In the past, I’ve shared scripts for you to use, which you find below:
Customer service scripts: Use these to handle any problem smoothly
Here are 10 script templates for trickly customer service scenarios
10 Customer service strategies that create repeat customers fast
How to handle all your customer service in 10 minutes a day
Step 10: Promote your Amazon products and offer discounts
Share your shop, products, and any special offers you run on social media platforms and among friends and family. Popular social media platforms include…
- YouTube
- TikTok
Building relationships and running sales can lead to repeat business and word-of-mouth referrals. If you’re not sure what to post or where or how to post your content, here are some helpful resources:
31 Days of social media content ideas
Social media demographics: What you need to know about each site’s core audience
How to get more social media followers without creating extra content
Easy social media hacks to help you save time and grow your audience
You can post regular updates about your Amazon products. Plus, anytime you create a sale or promotion, you should definitely post about that on social media. Amazon sellers can run the following types of promotions:
- Coupons
- Prime Exclusive Discounts
- Promotions
Coupons

To create a coupon on Amazon, follow these steps:
- Log in to your Amazon Seller Central account.
- Navigate to the Advertising tab. Click on the “Coupons” option from the drop-down menu.
- Click on “Create a new coupon” or “Create” to start the process.
- Select the products you want to offer the coupon for. You can choose specific ASINs or product SKUs that you want to include in the coupon promotion.
- Set the discount value and type. You can either choose a fixed price off or a percentage off the product’s price. Enter the discount amount you want to offer to customers.
- Define the budget and duration of the coupon. Set the maximum budget for the coupon campaign and select the start and end dates for the coupon promotion.
- Configure the redemption options. Choose whether the coupon can be applied once per order or once per item. You can also set the maximum number of units for which the coupon can be applied.
- Create the coupon title and description. Make sure to create a compelling and clear title and description that highlights the benefits of using the coupon and purchasing your product.
- Review the coupon details. Double-check all the information you’ve entered, including the discount value, duration, and redemption options, to ensure accuracy.
- Submit the coupon for review. Once you’re satisfied with the coupon details, submit it for review by Amazon. The review process ensures that the coupon adheres to Amazon’s guidelines and policies.
Prime Exclusive Discounts

Follow these steps to set up a Prime Exclusive Discount on Amazon:
- Log in to your Amazon Seller Central account.
- Go to the Advertising tab. Select “Prime Exclusive Discounts” from the drop-down menu.
- Click on “Create a new Prime Exclusive Discount.”
- Select the product(s) you want to include in the Prime Exclusive Deal. Choose the ASINs or product SKUs that you want to offer as part of the exclusive promotion.
- Set the discount value. Enter the discount amount or percentage you want to offer to Amazon Prime members.
- Define the start and end dates for the Prime Exclusive Deal. Choose the duration during which the deal will be active and visible to Amazon Prime members.
- Configure the visibility settings. Determine whether you want the Prime Exclusive Deal to be visible to all Amazon shoppers or only to Amazon Prime members.
- Create the deal title and description. Craft a compelling and clear title and description that highlights the benefits of the Prime Exclusive Deal and encourages customers to take advantage of the promotion.
- Review the deal details. Double-check all the information you’ve entered, including the discount value, duration, and visibility settings, to ensure accuracy.
- Submit the deal for review. Once you’re satisfied with the Prime Exclusive Deal details, submit it for review by Amazon. The review process ensures that the deal complies with Amazon’s guidelines and policies.
Promotions
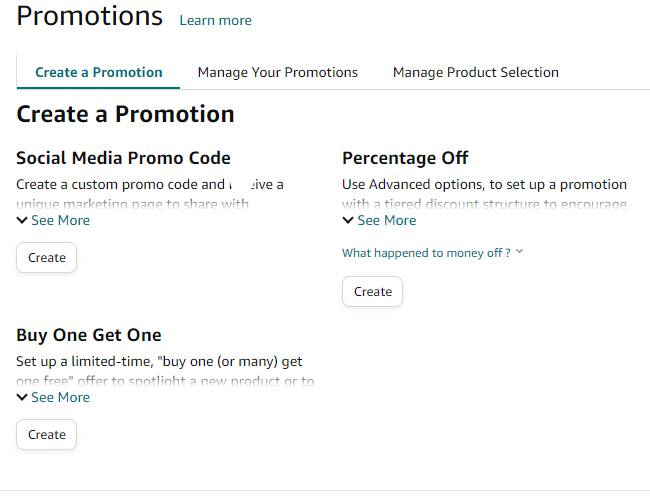
Follow these steps to set up a promotion on Amazon:
- Log in to your Amazon Seller Central account.
- Go to the “Advertising” tab. Select “Promotions” from the drop-down menu.
- Choose the type of promotion you want to create. Amazon offers various promotion types such as Money Off, Buy One Get One, External Benefits, and more. Choose the one that best suits your marketing strategy.
- Select the products you want to include in the promotion. Choose the ASINs or product SKUs that you want to feature in the promotion.
- Set the details of your promotion. This includes setting the discount amount, the duration of the promotion, any special conditions or restrictions, and the maximum redemption limits.
- Configure the targeting options. Decide whether you want to make the promotion available to all customers or only to a specific target audience, such as Prime members or customers who meet certain criteria.
- Create a promotion title and description. Craft a clear and compelling title and description that effectively communicates the benefits of the promotion to potential customers.
- Review the promotion details. Double-check all the information you’ve entered to ensure accuracy and make any necessary adjustments.
- Submit the promotion for review. Once you’re satisfied with the promotion details, submit it for review by Amazon. The review process ensures that the promotion adheres to Amazon’s guidelines and policies.
- Wait for approval. After submission, wait for Amazon to approve your promotion. Once approved, the promotion will be active and visible to customers who meet the specified criteria.
…Do you want to get started selling mugs on Etsy and Amazon with ZERO design skills or experience needed? If so, watch my free webinar today and learn how you can create your very own passive income business at home. Here’s the link: https://lowhangingsystem.com

Learning how to start your own Amazon business doesn’t require any previous experience. You just need to be willing to learn along the way. If you have any other tips you’d like to share about becoming an Amazon seller, leave a comment below.
If you loved this post, check out five articles related to starting your own Amazon business by clicking the links below:
-
5+ Best small business ideas you can start today – Turn your passions into cash flow
-
Everything you need to win at selling print-on-demand with Etsy and Amazon
-
Ultimate time management guide to getting started with LHS (Etsy and Amazon)
-
How to get more sales on Amazon (even if you’ve had a slow start)
-
12 Hacks to help you sell more Amazon print-on-demand products