

This blog post may contain affiliate links. If you click on these links and make a purchase, I may receive a commission at no extra cost to you. Please note that this blog is primarily for educational purposes and the content here is not intended to be a substitute for professional financial advice. Please review my disclaimer and terms here.
Being a successful Amazon seller involves ongoing learning.
Amazon has a number of features and tricks up its sleeve that you may not know about. Plus, it’s continuously rolling out new programs and promotional opportunities that can help you make more sales.
To take some of the research work off your plate, I wanted to share a list of Amazon features and programs that I read about recently. Some of the features have been available for a while and a couple of the programs are new as of this summer.
These features and programs can help you better manage your business and keep your sales flowing consistently. They include the following:
- In-Stock Head Start pilot
- Voice of the Customer dashboard
- User permissions
- Notification preferences
- FBA Donations Program.
Now, let’s take a closer look…
Amazon’s In-Stock Head Start pilot program
In-Stock Head Start is Amazon’s new pilot program. The way the program works is it makes your temporarily out-of-stock products available to customers to purchase once your items are on their way to the fulfillment center and Amazon is aware of their arrival date.
When your products go out of stock, your product discoverability and sales can be negatively affected. But enrolling in the In-Stock Head Start program offers your customers a wide range of available products and it helps your sales and traffic flow be more consistent.
Out-of-stock products are eligible for the program if they are sent to the fulfillment center using one of the following programs:
Amazon uses information gathered from these three programs to determine your products estimated in-stock date.
Enrolling in the In-Stock Head Start program is really easy. All you have to do is click the Enroll now button here, which is also where you can learn more about the program.
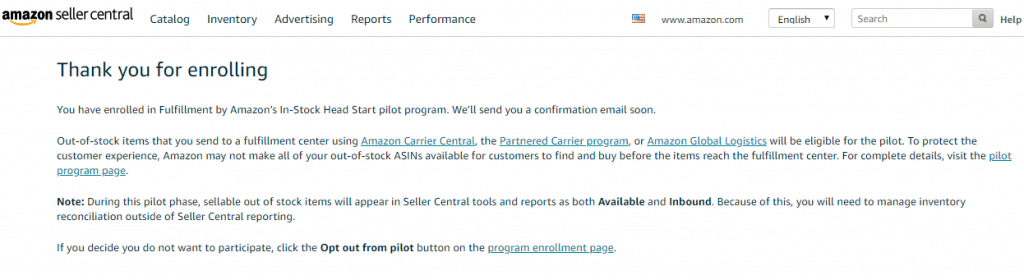
After clicking Enroll now, you’ll be taken to the following screen:
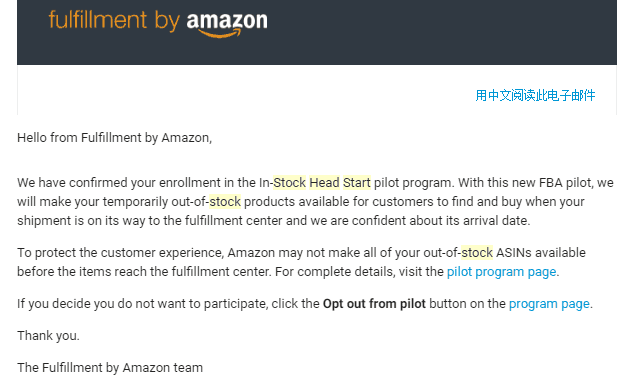
The confirmation email you receive looks like this:
Here are a few more important tidbits about the program:
- The delivery date for out-of-stock items is based on an estimated in-stock date. But if items are delayed for whatever reason, Amazon will adjust the in-stock date for you.
- At this time, you are unable to choose specific ASINs to take part in the program.
- You shouldn’t change your inventory replenishment cycle after enrolling in this program. Keeping your items in stock in the first place is still the best approach. This program should operate more as a safety net.
Since this is a pilot program, you may decide it’s not for you. In which case, opting out is easy. Just click the Opt out from pilot button here.
Also, please note that this program does not apply to the normal Low Hanging System dropship/print-on-demand products. It applies only to FBA items, or those items sent directly to Amazon as inventory to be stored in Amazon’s fulfillment center.
Voice of the Customer dashboard
The Voice of the Customer dashboard helps you better understand your products’ Customer Experience (CX) Health by comparing your listings’ CX to other similar products.
On your dashboard, you can review all of your products’ customer feedback in one convenient place and discover any systemic issues, such as mislabeled products or incomplete detail pages. This allows you to quickly address these issues so you can optimize your products and listings and improve your sales.
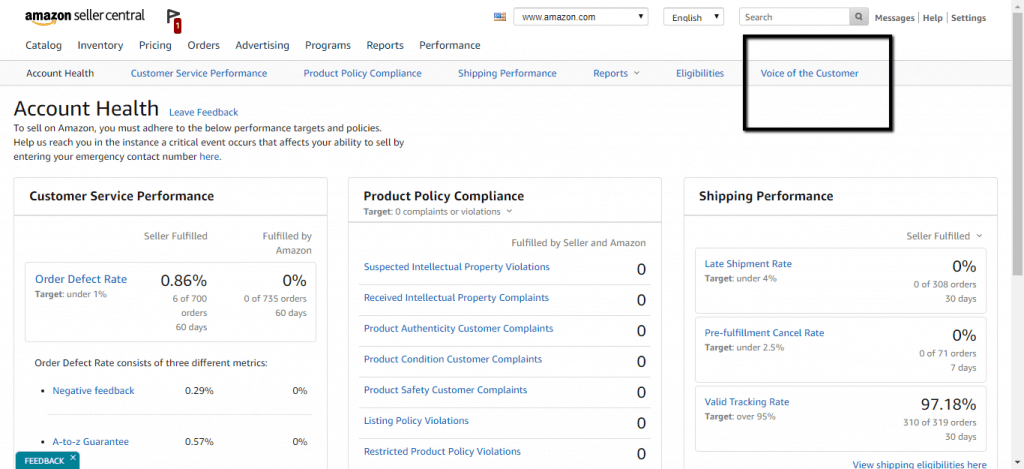
To get to your Voice of the Customer dashboard, follow these simple steps:
- Go to your Amazon Seller Central account.
- Under the Performance tab, click Account Health.
- On the right-hand side, click Voice of the Customer.
This will bring you to a page that looks something like the following:
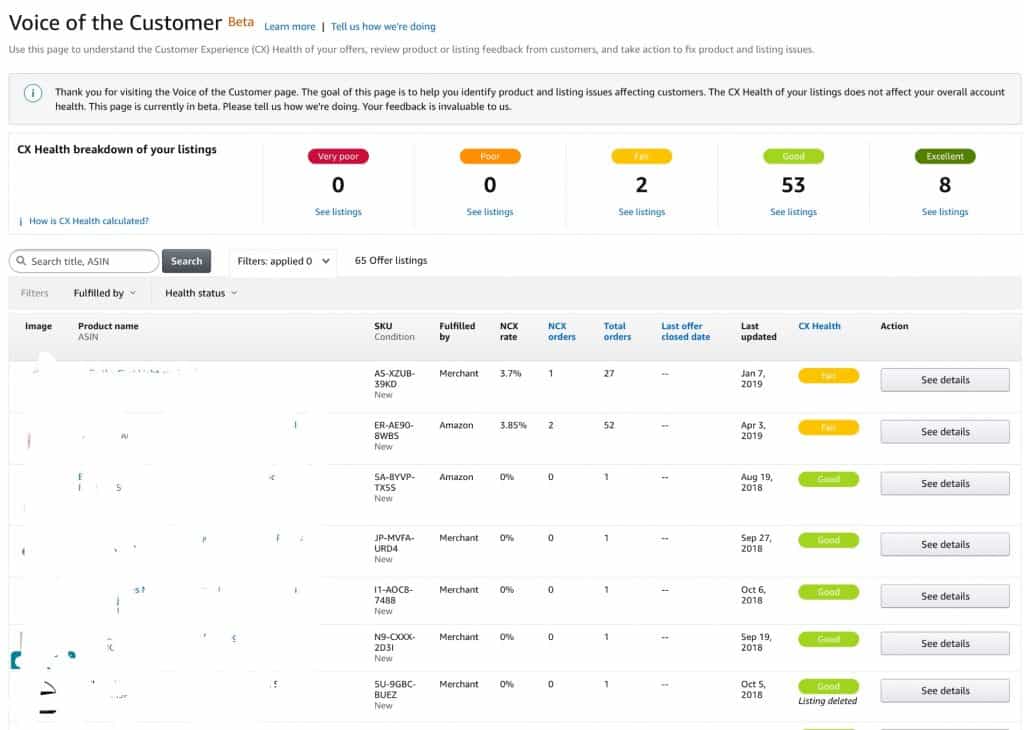
(I found this image here.)
As you can see, your Voice of the Customer dashboard gives each of your listings one of the following ratings:
- Very poor (red)
- Poor (orange)
- Fair (yellow)
- Good (light green)
- Excellent (green).
This is determined based on your listings’ negative customer experience (NCX) rating and how that compares to other similar listings. Your NCX rating is found by dividing the number of orders for which customers report product or listing issues by your total number of orders.
To arrive at this metric, Amazon includes feedback from the following sources:
- Returns
- Refunds
- Customer service contacts
- Product reviews
NOTE: Product delivery issues do not affect sellers’ CX health, and NCX ratings and CX health apply only to listings with recent sales.
For any of your listings that receive subpar ratings, you should take immediate action to remedy the issues. To learn more about how to resolve your listings’ CX health problems, click here.
Common solutions include the following:
- Create a removal order
- Edit the listings’ product detail page
- Relist your product.
User permissions
Especially if you work with outsourcers, you may want to give other people access to your Seller Central account, which you can do by sending out invites and updating those people’s user permissions.
I’ve given access to my account to several of my team members who help me with Amazon-related tasks.
If you’re interested, here’s how you can do that too:
- Log into your Seller Central account.
- Go to settings and choose User Permissions from the drop-down.
- On the next page, add in the name and email address of anyone you want to give account access to.

- Click Send Invitation.
You can grant access rights to up to 100 additional users and give each user his or her own unique login credentials. You can also specify exactly which parts of your account users are able to view and edit.
After you send an invitation, the new user will be added to the Invited Users section of your account. Each invited user will receive an email with a link to where they can create their own user name and password for your account.
After doing this, new users will show up as Pending. You can then click Confirm, which will allow you to edit new users’ permissions, specifying which account features they may access or modify. You will have four permission options to choose from for each section of your account:
- None – New users will not have any access to this particular section.
- View – They can only view this section.
- View & Edit – They are able to both view and edit this section.
- Admin – New users will have full admin permissions.
After editing new users’ permissions, click Continue to save your settings. You’re able to edit user permissions whenever you want.
Please note, however, that you may need to have a Professional Seller account to use this feature. I’m not sure if it’s available to Individual Seller accounts.
Notification preferences
In case you want to change the email address to which you receive Amazon notifications or if you want to modify the types of notifications you get, you can do so by updating your notification preferences.
Here’s how to do that:
- Log into your Amazon Seller Central account.
- Go to the Settings tab and select Notification Preferences.
- On the next screen, you can click the edit buttons to change any of the fields you want.
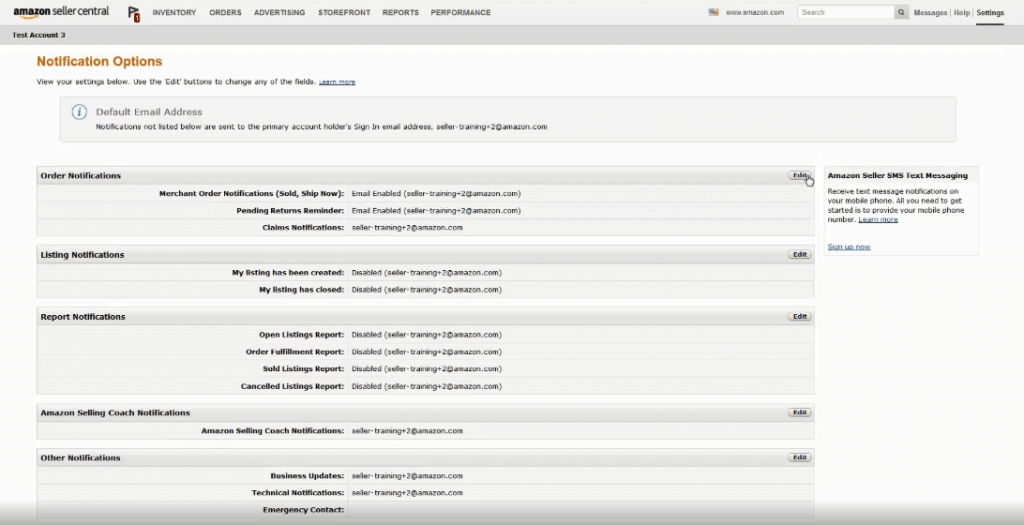
- The Edit buttons take you to a screen on which you can assign multiple email addresses and either enable or disable certain alerts.
As you can see from the image above, there are five categories of Amazon notifications that sellers receive:
- Order – You get these notifications each time someone buys one of your products, when there is a return request, and whenever a charge is disputed.
- Listing – You receive these notifications each time you create a new listing and when one of your listings closes.
- Report – These notifications are sent whenever one of your reports is ready to download.
- Amazon Selling Coach – These notifications offer tips to help you succeed with Amazon. You can enable or disable these alerts whenever you want.
- Other – Other notifications you may get include business updates (e.g. new features, promotional opportunities, selling tips), technical notifications (e.g. scheduled changes or outages), and emergency contact notifications (you can provide an emergency contact so Seller Support can get in touch about emergency situations that could affect your account).
FBA Donations Program
The FBA Donations Program is new as of September 1st. It provides FBA sellers with the option to automatically donate their unwanted or excess inventory to select U.S. charities instead of having it destroyed (only inventory stored in U.S. fulfillment centers is eligible).
Amazon’s usual disposal fees still apply, but sellers aren’t charged any additional fees to make the donations or to arrange deliveries.
FBA sellers are enrolled in the program by default.

But if you choose to opt-out, you can do so by…
- Logging in to your Seller Central Account.
- Going to the Settings tab and selecting Fulfillment by Amazon.
- Scrolling down to where it says FBA Donations Program.
- Clicking Edit.
- Choosing Disable.
- Clicking Update.
If you wish to stay enrolled, you can use your Removal Shipment Detail report to track your donated items. You can find this report by clicking Reports and choosing Fulfillment from the drop-down.
The Removal Shipment Detail report is found near the bottom of the page. After downloading it, look in the Carrier Name field for items labeled Donation.
To learn more about Amazon’s charity partners as well as tax considerations for your donated items, click here.
I hope you find these Amazon features helpful! If you decide to enroll in any of these programs, especially the In-Stock Head Start pilot, be sure to leave a comment below and let me know what you think! Also, if you enjoyed this post, please share it with your friends and followers.